
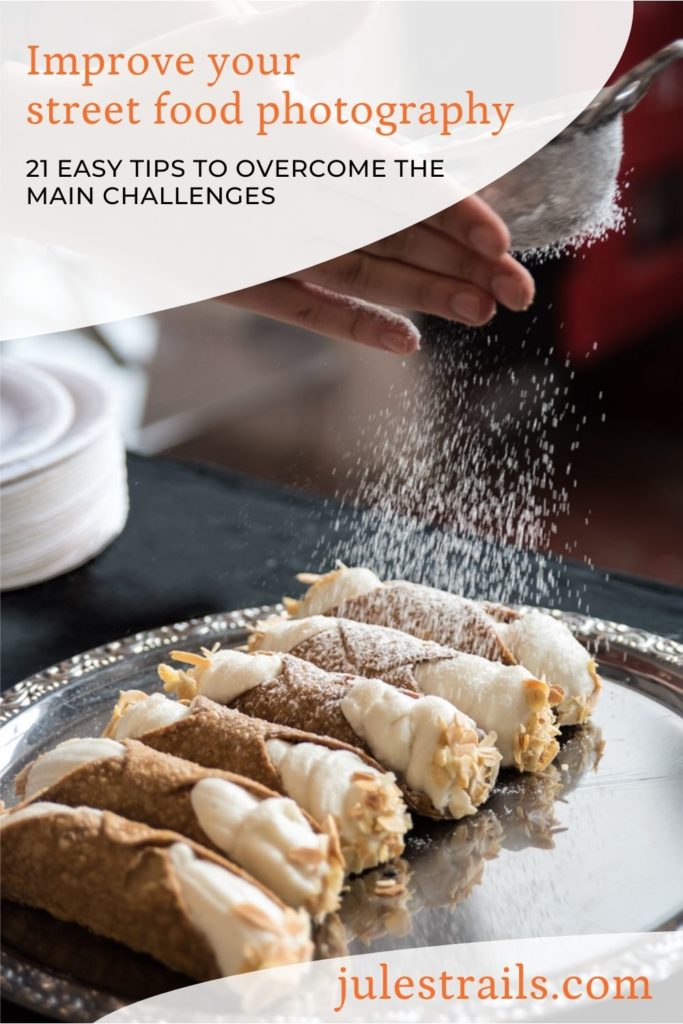
21 easy tips to improve your street food photography
Learn the tricks and techniques to take great photos of street food while you’re travelling
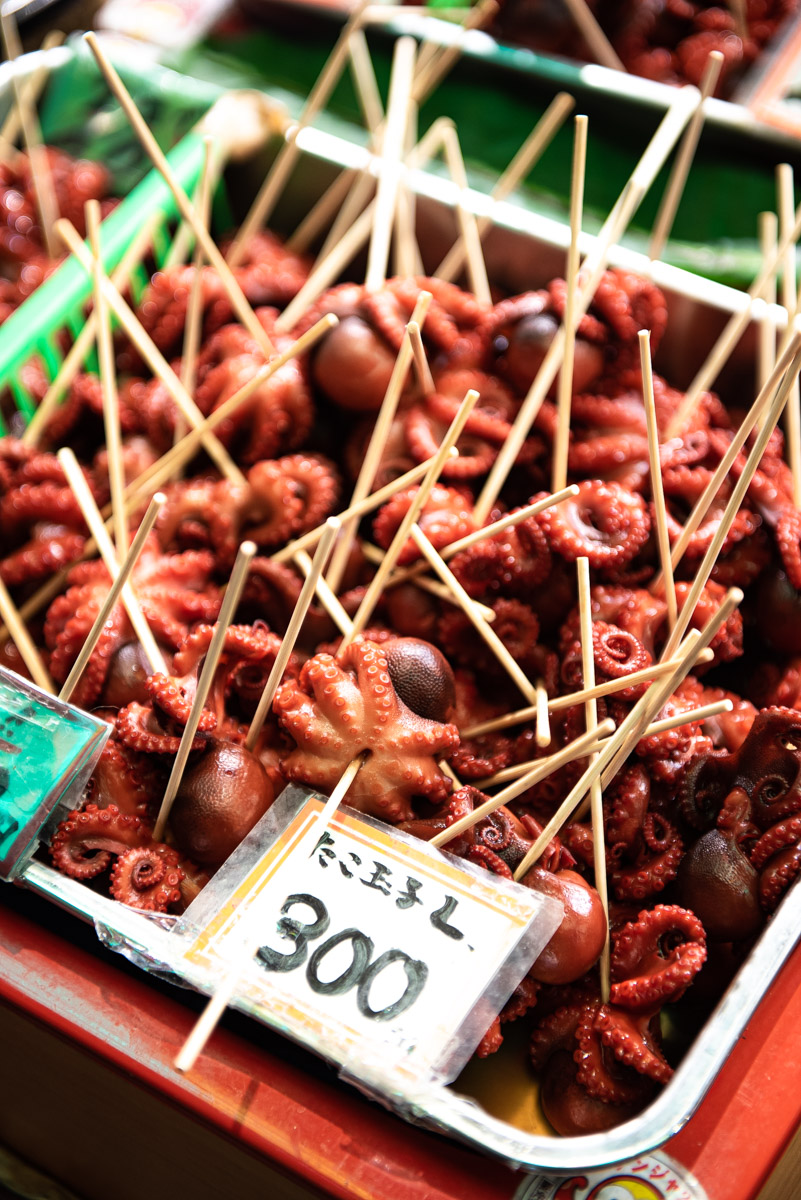
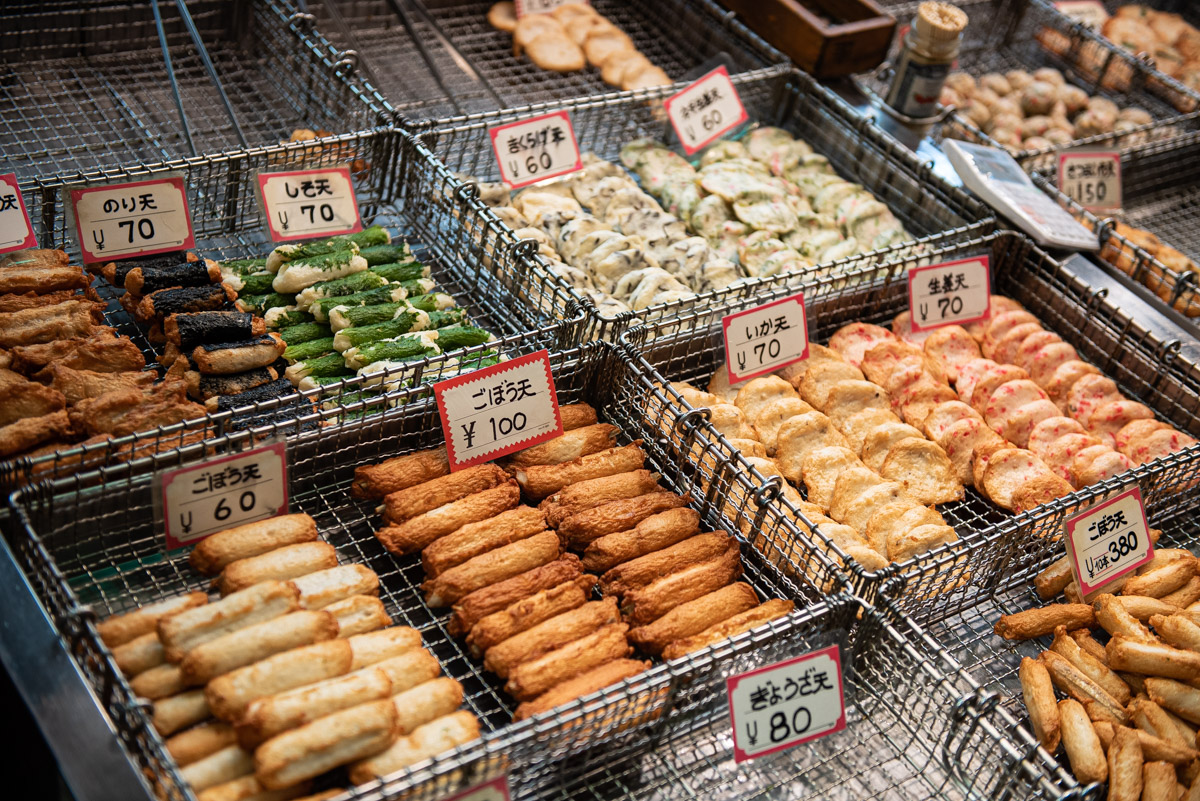
If you are a foodie traveller like me, food markets are the first MUST VISIT whenever you go to a new city.
The beautiful fresh produce, the smells, the colours, the noises and the hustling and bustling of life in markets is incomparable to any other experience.
It is one of the best ways to get an overview of the culture and people of a country.
And the street food.
Oh, don’t get me started on the street food.
Vendors skillfully preparing all sorts of delicacies in front of your eyes, unknown whiffs of deliciousness entering your nostrils, sound of sizzling ingredients cooking on Mordor-hot plates….
Taking good photos of all of this can be overwhelming.
So let’s have a look at how you can improve your street food photography with easy tips that will make your guerrilla food travel photography stand out!
- Why you should listen to me
- My go-to camera gear for street food photography
- Best practices while shooting street food
- Light tips for street food photography
- Composition and styling for street food photography
- Storytelling
- How to take portraits of vendors
- Convey the personality of the market
- Best backgrounds
- Creative backgrounds and thinking out of the box
- Remove clutter and fill the frame
- Best props when your choices are limited
- Tips for shooting street food when travelling solo
- Add the human element with the help of others
- Play with your food!
- How to shoot action street food photography
- Editing Street food photography
- Conclusion
What do I know about photographing street food?
I am lucky enough to work with amazing clients such as National Geographic Traveller Food.
Obviously, NatGeo needs little introduction – their food-focused magazine speaks to the foodie traveller and tells amazing stories of culinary experiences, amazing producers, traditions and cultures of food around the world.
I know, #dreammagazine, right?
When I go for assignments, I have to shoot food guerrilla-style while travelling.
No studio, no lights, no tripod, no props, no stylists, nothing.
Just me, my camera, my creativity and my skills.
Travel food photography is very different from traditional food photography and it’s got its challenges for sure!
If you’ve ever tried your hand at it, you will surely know how frustrating it can be.
You have all this beautiful food right in front of you and yet – the photos are crap.
Like, mega crap.
The light is ugly, the colours are weird, there’s clutter and mess everywhere, people get in your way, you feel the pressure of shooting quickly in the busyness of the environment…
I feel ya.
After years of shooting street food while travelling, here are my top tips to overcome these challenges!
My go-to camera gear for street food photography
Ok, I have to admit, this is my go-to gear for almost all my travel photography!
I am not one of those photographers who focuses on gear a lot, especially when I travel!
In my studio, I have all the space and comfort to be a tech geek.
But on the road I like to be minimalistic and travel light.
Often I have to carry that equipment on my shoulders for hours so I pack the bare essentials.
My trusted Nikon D750 (her name is Ariel) is my body of choice for street food photography.
She can handle high ISO like a beast, her auto white balance is accurate and does a great job in mixed light situations, she has a great dynamic range so you can make adjustments in editing easily.
These characteristics are GOLD when you’re trying to photograph a dark market full of mixed light sources at different intensities!
Also, importantly for guerrilla-style photography, it is one of the cameras with the best ergonomics and handling of all times. It makes you feel happy just holding it.
The grip is fantastic and solid and she’s got buttons in all the right places so it’s intuitive and easy to operate without looking.
Pair that sexy body with an even sexier lens and you have a killer combo.
I choose the Nikon 24-70mm f2.8. It is one of the best lenses Nikon ever made.
The wide aperture allows you to capture more light in dark markets, as well as blurring out distractions while maintaining great sharpness.
It offers the kind of focal range to cover most situations in street food photography. Wide-angle for scene setters and tele for close-ups of foods and portraits.
That’s it. That’s all the equipment I carry to shoot street food photography!
Now let’s dive into the details of how to improve your own shots!
Best practices while shooting street food
1. Be a respectful photographer
Let’s address the elephant in the room.
When photographing street food, always remember that you could often be a disturbance in the everyday life of the people in the market.
Vendors are there to do business and serve their customers, not to be your models.
I know this sounds harsh, but it is the truth and luckily there’s plenty you can do about it!
Try not to be in the way too much – vendors are running around with heavy loads on their shoulders, carrying produce, ingredients and other supplies to their stalls.
Also, if you stand too long in a busy spot, you’ll start incurring the annoyed gazes (and angry elbows) from the shoppers who are trying to pass you by while carrying huge bags full of heavy ingredients.
Think about it, if you were a tired and busy mum doing your daily shopping, you’d have no patience for tourists that get in the way.
This takes us to the next tip
2. Go before rush hour!
Do your research and check the stalls’ opening times.
To maximise your chances of getting great shots, you want to beat the crowds!
The market will hopefully be empty-ish so you have more opportunities to get wider shots of the market and the stalls, as well as chat with the vendors and build some rapport with them!
They will be happier to pose for you if they’re not swamped with orders and have a huge line to serve!
Also, go before you get super hungry.
It’s hard to focus when your stomach is growling and delicious food is prepared right in front of you!
3. Get your bearings and explore the market camera-free
It’s useful to have a first stroll around the market without your camera!
This will give you the opportunity to pinpoint the best street food stalls and what food you should order, understand what the light is like, get a sense of the pace of the market and the things that go on around you so you can stand in the right spots without being disturbed and without getting in the way.
It will also give you an opportunity to scout for available backgrounds and props (see tips 13, 14 and 15) so that by the time you have hot food in your hands, you’ll know exactly where to go to take your shot.
4. Be aware of the time pressure
Markets are busy places and this puts a lot of pressure on the photographer!
Vendors haven’t got much time to pose for you before they need to serve the next customer in line or someone is about to walk in front of your subject so you need to take that shot.
Like, now or never.
Markets are full of fleeting moments and you need to be ready.
This means that you need to know your camera inside and out and you need to be able to operate it quickly!
No time to fiddle with the settings.
And often no chance to even check your shots before you’re dragged away by the crowd and need to move on.
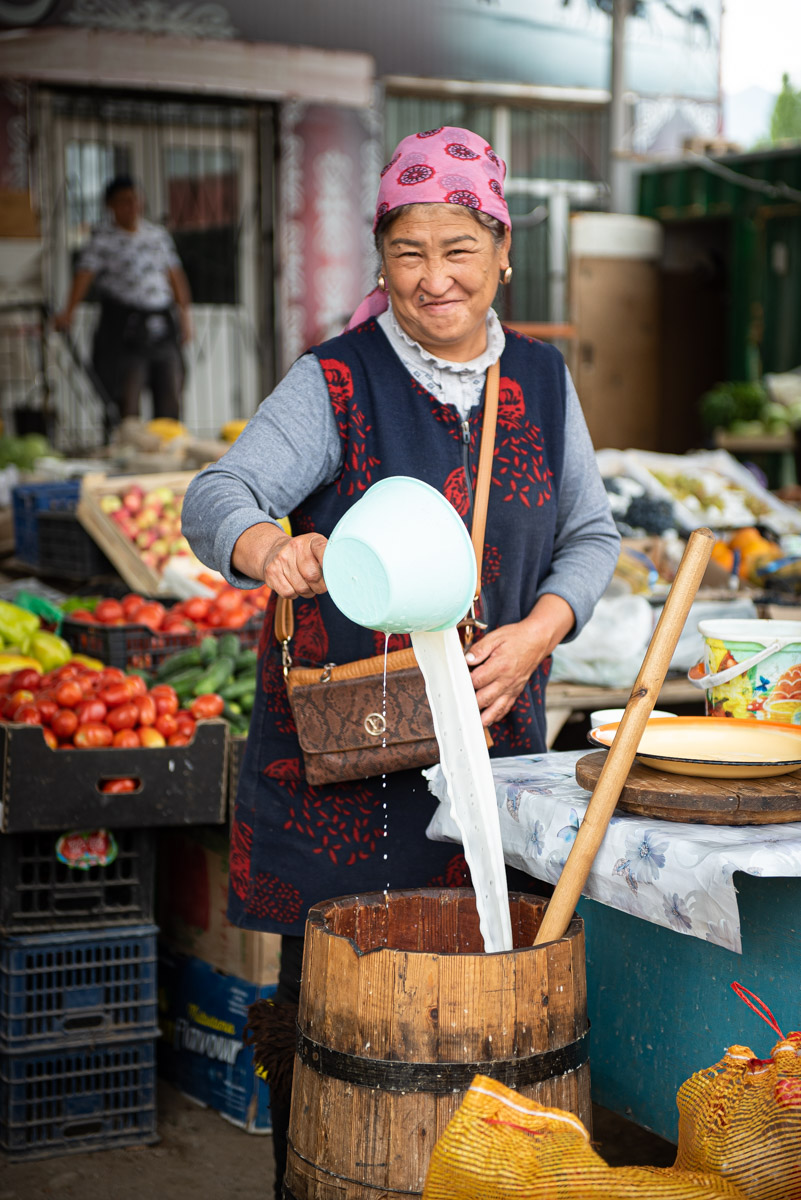
5. Take a break to regroup
Sometimes the bustling of the markets can get overwhelming.
Everyone rushing and shouting, the pressure to get the shots quickly, the frustration from many failed images because of things happening too fast for you to keep up, people bumping into you, people bumping into your camera….
It can be a lot!
Breathe. You got this.
Sometimes you need to step away from the crowd, take a moment, regroup and refocus before diving back in.
Find a corner that is out of the way and take the chance to check your shots and see how you can improve them.
Here is where you change your settings, analyse your shots and learn your lessons.
You can always retrace your steps and have another go at capturing that pouring shot!

Light tips for street food photography
Now, let’s talk about light for street food photography.
If the market is outdoors and it’s a day with beautiful light, congratulations!
You just won the street food photography game.
You’re going to end up with killer shots.
However, more often than not, it’s hard to get good light in street food markets.
A lot of them are either indoors (AKA dark AF) or shaded by ugly rainproof covers that cast light with weird colours (AKA alien-looking food)
What to do?
Sometimes the only thing you can do is embrace it and work with it.
Be equipped with a camera that can handle high ISO and a fast lens, one that can have a maximum wide aperture of f2.8 or wider.
My favourite is the Nikon D750 + Nikon 24-70mm f2.8 combo.
Shoot with high ISO and an open aperture to get as much light as possible.
These next few tips will help you overcome the crappy light challenge so listen up.
7. Chase the right light
If the market is outdoors and you have light, you still need to make sure you have the right light. The best light for food is diffused, directional light – which adds a nice contrast between shadows and highlights – coming from either side of the subject.
This adds depth to the shapes and emphasises the textures of the food.
Try to avoid light that is coming from behind the camera and to the front of the subject as it does the complete opposite and makes your food look dull and flat.
This is mostly true for close-ups of the food itself.
If you’re shooting wider scenes and portraits, diffused natural light coming from any direction (except behind the subject) will mostly be fine.
Something you can do to make sure you have the best possible light is to find the right spot before you order the food, check tip X.
The majority of street food is take-away anyway so you can (and should) move to chase the right light.
This is true also and especially if the market is indoors or covered.
Get your food and go out into the light!
8. Shoot RAW for easy white balance and colour corrections
I’m sure you know that you should always shoot RAW.
Any photographer would talk about the reasons why for hours. But I’ll spare you.
For now.
Shooting RAW is especially useful in difficult light situations.
In street food markets, you have all sorts of mixed light sources: some natural light, some tungsten bulbs, some LED lamps, flames and fire…
Your white balance will be all over the place.
That’s why if you shoot RAW you can set your camera on Auto White Balance (which usually does a good job) and you still have the possibility to change to any other white balance in post-production and even make selective adjustments in different areas of the frame.
BONUS TIP: if you really can’t get the white balance and colours to look good, turn your images in black and white!
This is a very effective technique to add drama and depth, especially to your portraits.
9. Shoot RAW for easy light/shadows corrections
For similar reasons, it’s useful to have as much information in your dynamic range as possible.
For nerds, the dynamic range is the range of contrast between the brightest and darkest tones that a camera can capture in a single exposure.
The lamps and lights in street food markets are rarely diffused and soft.
Generally, they emit quite a harsh, intense and hard light which creates strong contrasts between highlights and shadows.
That’s why having more information in your files it’s super useful when you’re trying to balance out the lights/shadows in editing.
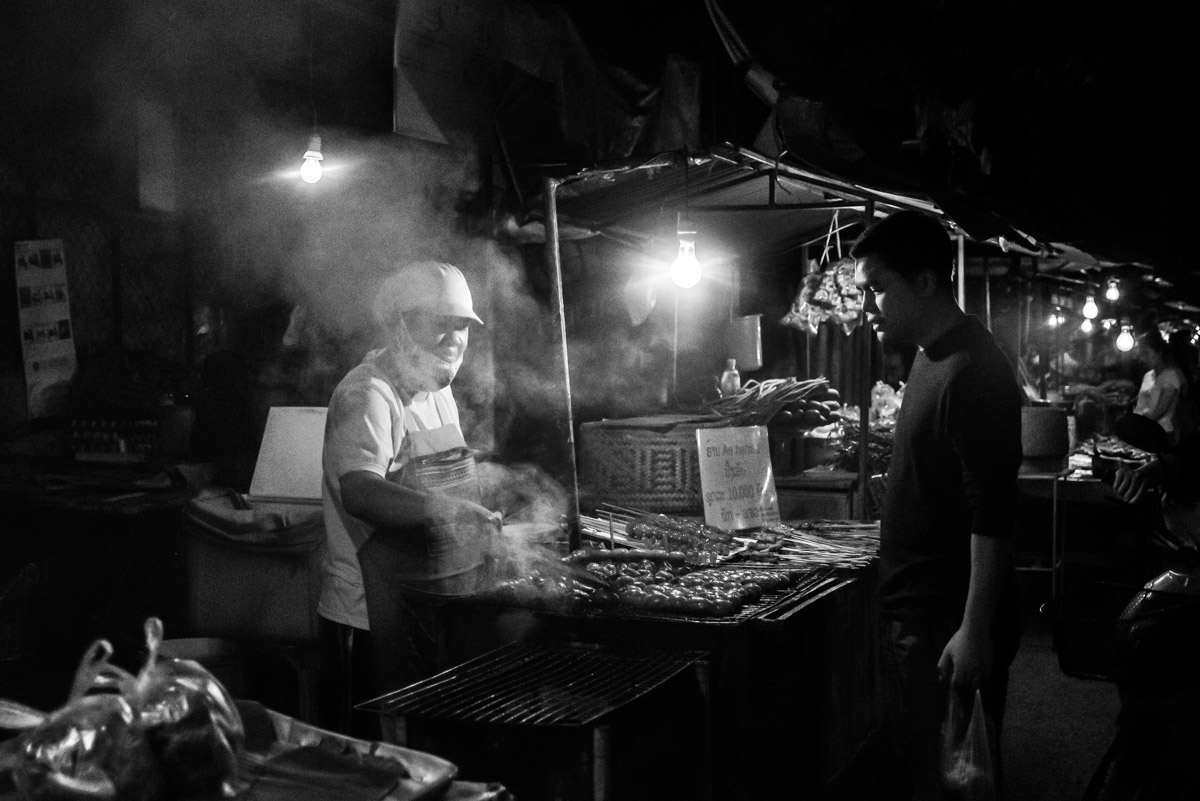
10. Nail your exposure and use darkness to your advantage
Because of these particular light conditions, you might encounter the “spotlight effect” meaning, light shining bright on your subject while the background stays dark.
Use it to your advantage!!
Se your exposure meter on SPOT and get the correct exposure for your subject while underexposing everything else in the scene.
This will create a natural vignette effect making your subject really stand out and POP!
Composition and styling for street food photography
When the light situation is tricky, one thing you can do to improve your photos is to focus on your composition and styling.
When photographing street food you often have little control over food styling, props, backgrounds and the lot and there are some things you can do to make the most of what you have available.
11. Storytelling in street food photography – tell the whole story
While it might be tempting to only shoot crazy close-ups of your food, they’re not enough to tell a deeper story.
Don’t get me wrong, you should definitely get those shots.
Just make sure to match them with wider frames that include scenes of the whole market, the street food stalls, portraits of the vendors and the chefs as well as images of the local people enjoying the food.
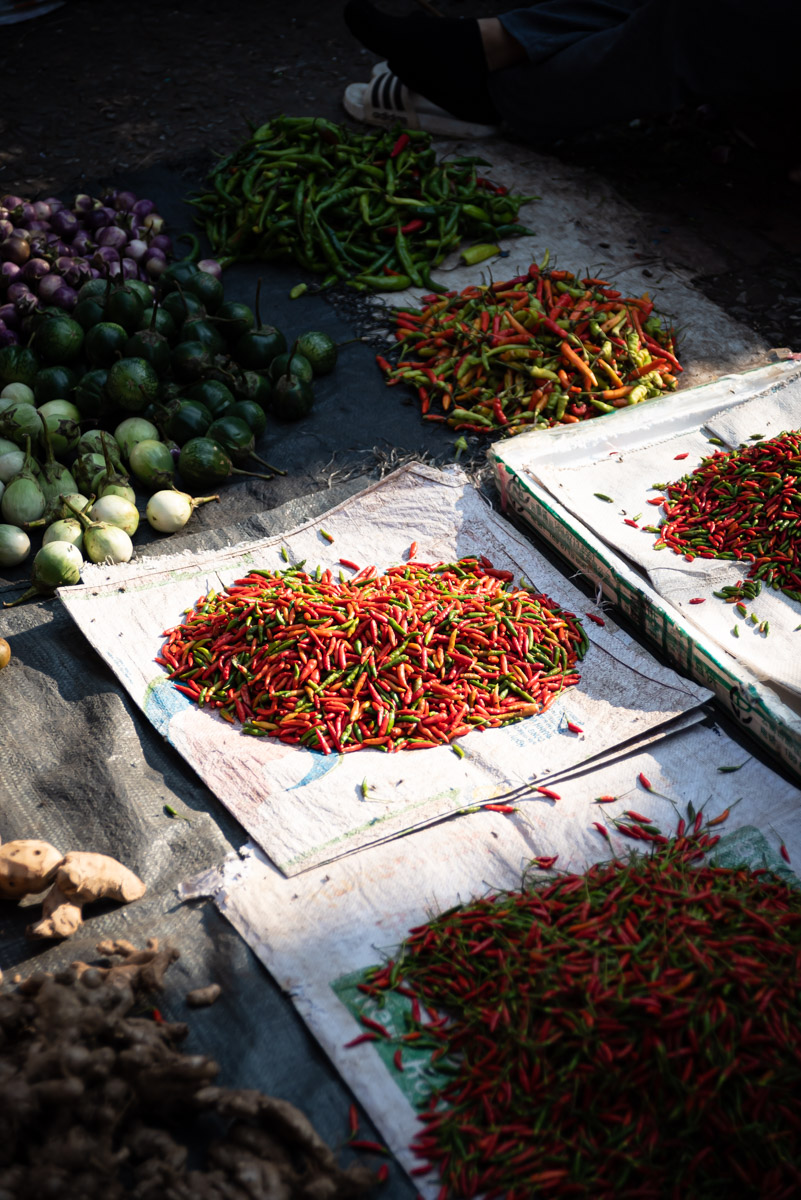
Don’t forget actions shots and shots of textures, ingredients and local utensils.
All these elements will come together and enrich your street food story.
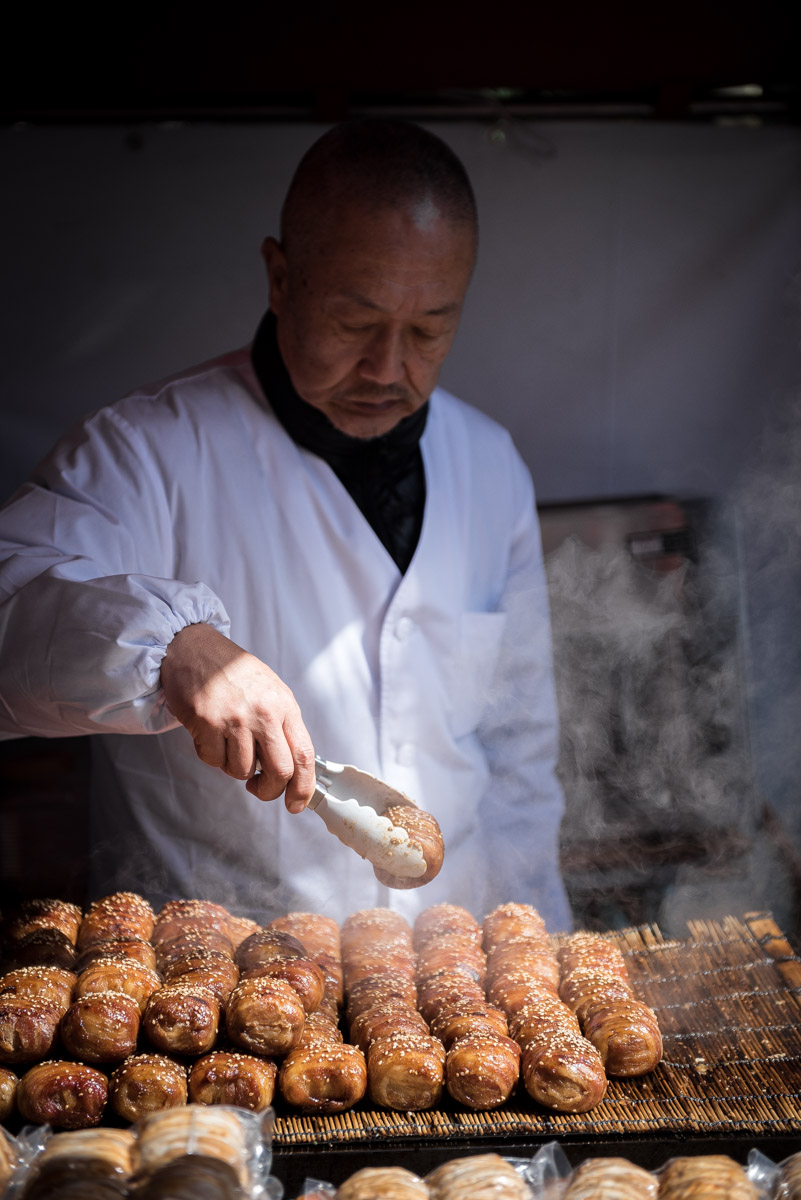
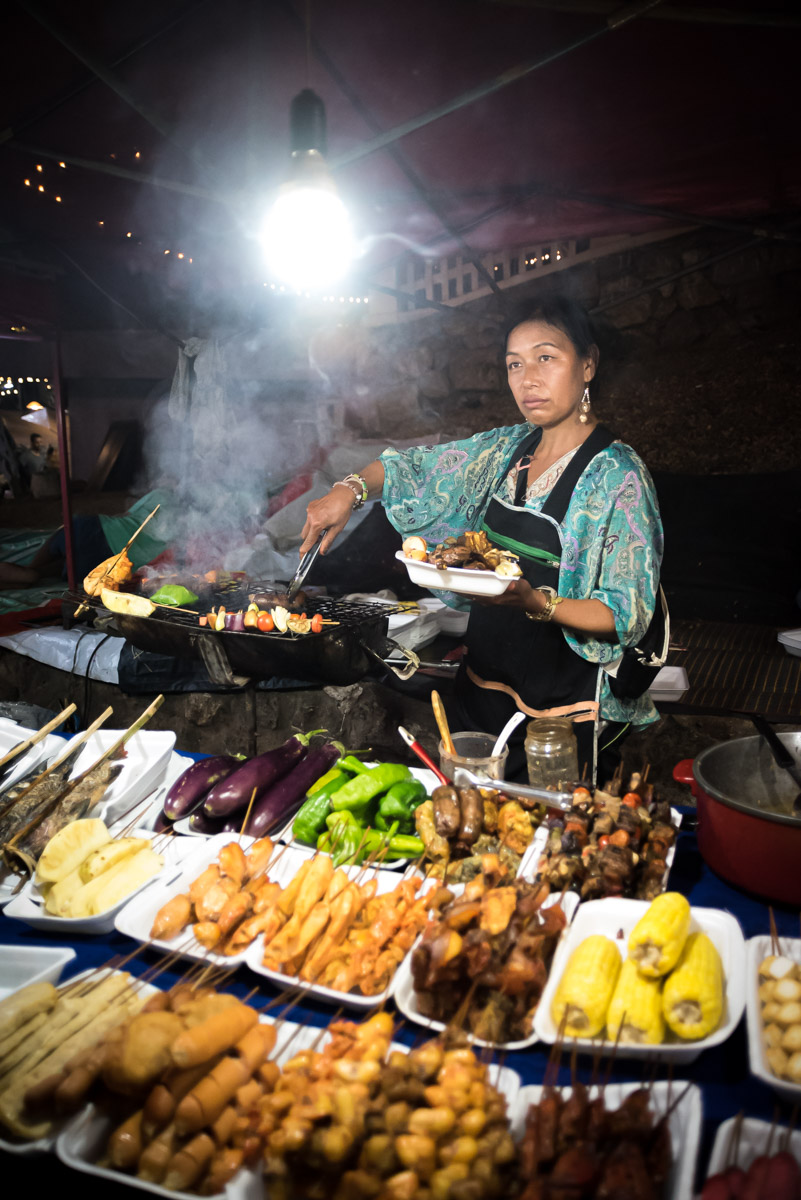
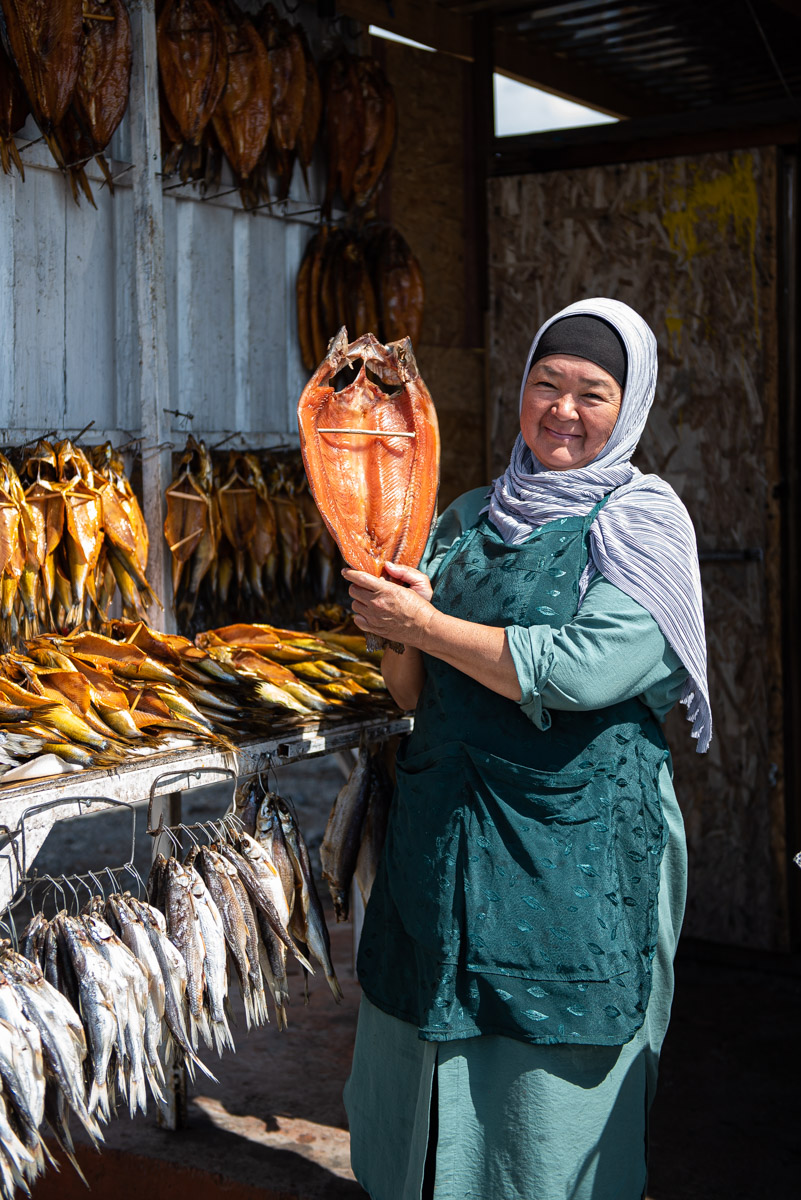
12. How to take portraits of street food vendors
The story wouldn’t be complete without the people who mastered the art of street food and serve amazing dishes on the fly.
Taking portraits of people is challenging, sometimes the photographer is shyer than the subject!
You’ll notice that vendors are quite happy to have their photo taken if you approach them in the right way (see tips 1 and 2).
Something else you also have to keep in mind is building rapport and asking for permission – that’s how you get the best and most genuine smiles which make for killer shots!
Sometimes it’s helpful to buy a small item or to place your order before asking to take a photo.
Obviously, the fact that you’re going to eat their food makes them more open to the interaction.
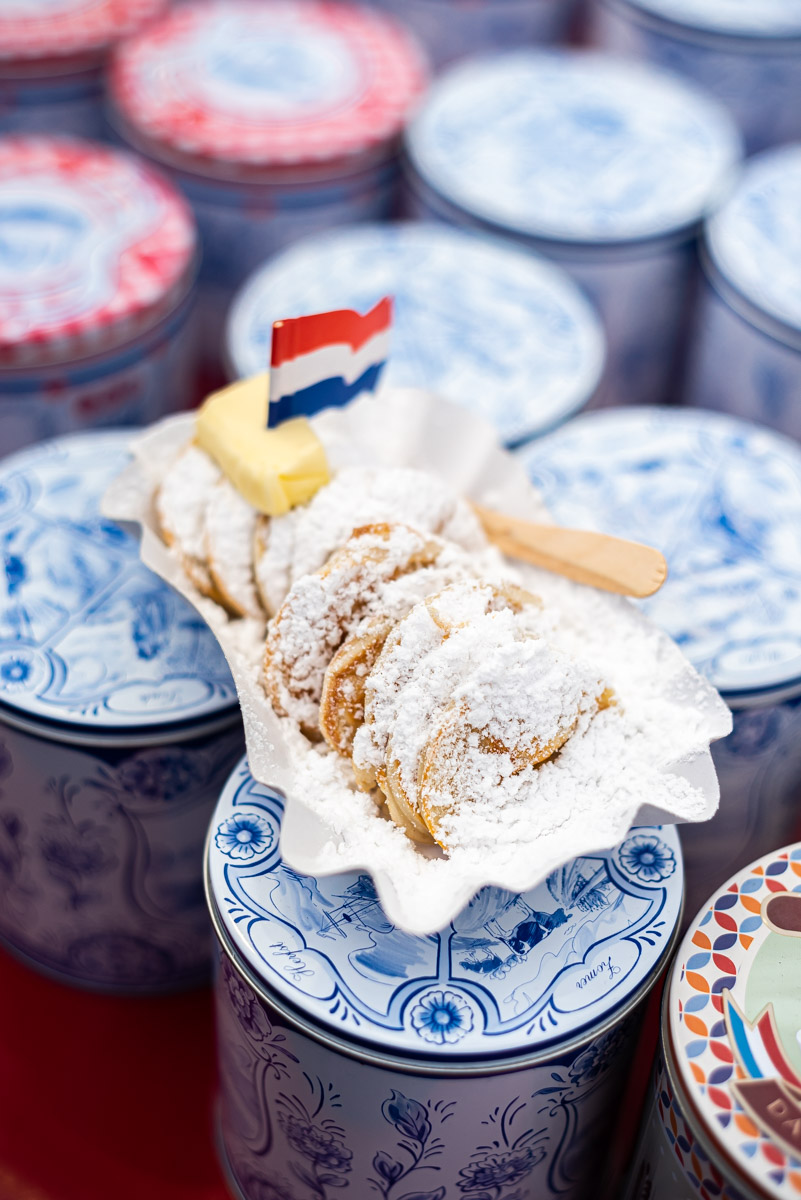
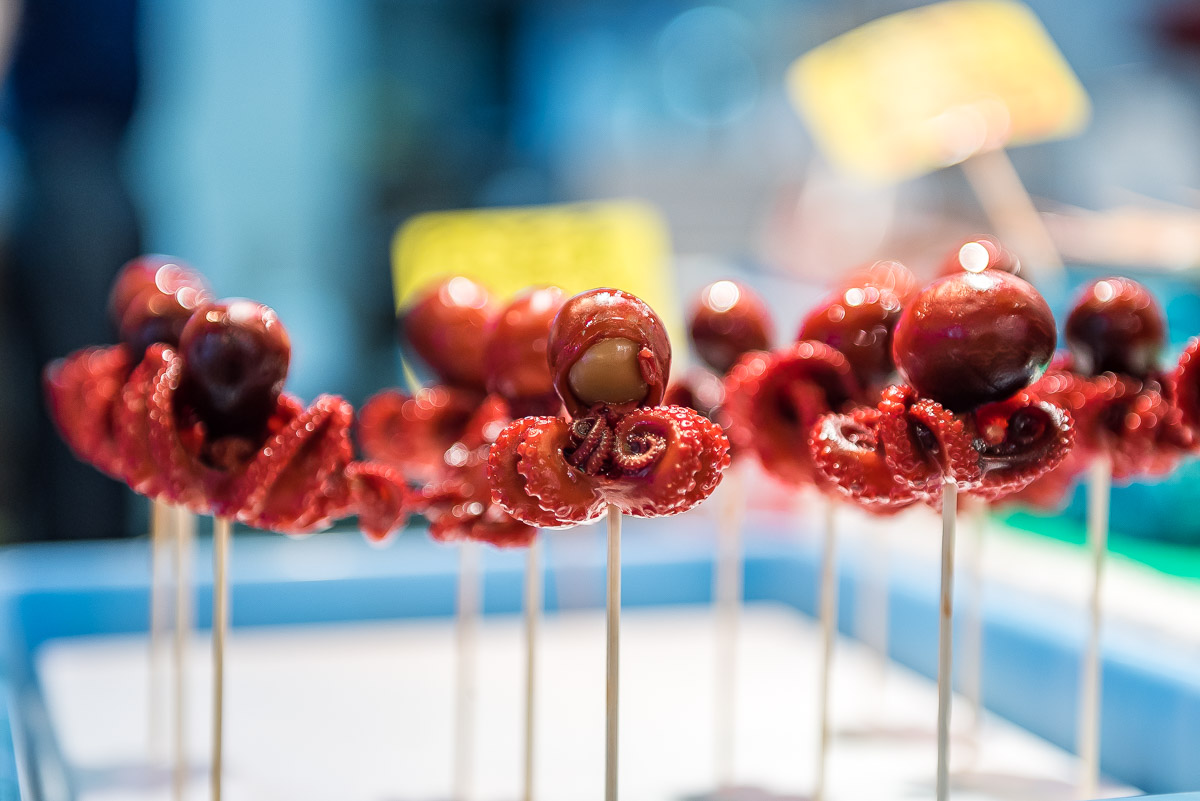
13. Convey the unique style and personality of the place
Each market in the world is unique and you want their personality to shine through!
This is harder to achieve when taking close-ups of the food.
Try to include coloured walls, distinctive tables and characteristic floors in your composition to get elements of the market’s vibe in your story.
This will help you convey a sense of place and will do justice to the unique style of the market!
14. Backgrounds for street food photography
Think about how you’re going to frame your subject and have a look at what would be behind it in your composition.
You want to capture the atmosphere of the market but you don’t want something that’s too distracting.
A blurred overview of the stalls and market can also work, just be careful of people passing by and wearing bright clothes! Use a wide aperture to get a softer and less distracting background.
Sometimes, you might need to use some retouching and cloning if you want your images to look a little more polished.
Don’t do it to the point that it takes away realism from the frame, a nice balance between authenticity and refinement is always the best option.
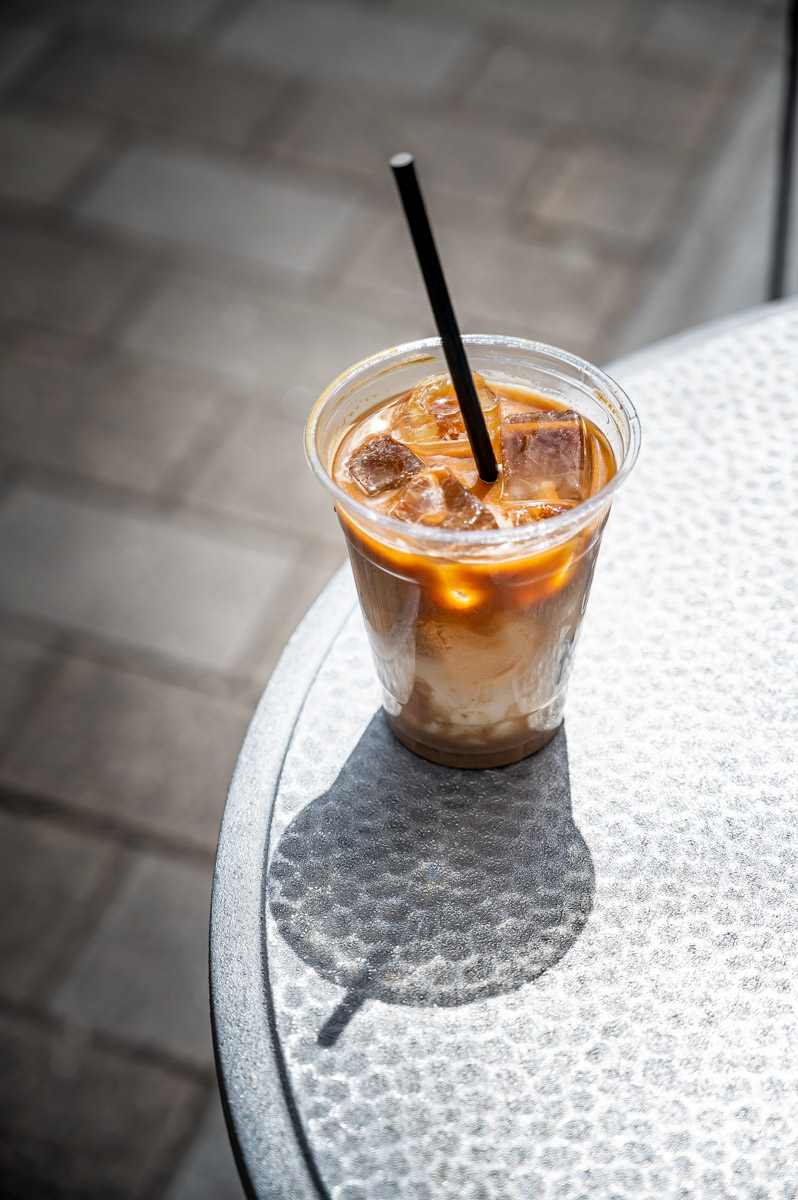
15. Creative backgrounds on the fly for street food photography
When having a first look around (see tip 3) look for corners with good light as well as relevant and considered backgrounds.
A table, counter, stool or bench in the corner with a wall as a background generally works, especially if the wall in question has a characteristic and interesting texture: brick, concrete, plaster, cushions – these are all great options!
In these cases, you have to think out of the box – you’d be surprised at how many textures can work as food photography backdrops!
A floor with interesting concrete, a marble staircase, a bench, grass, the top of an electric box… get creative here!
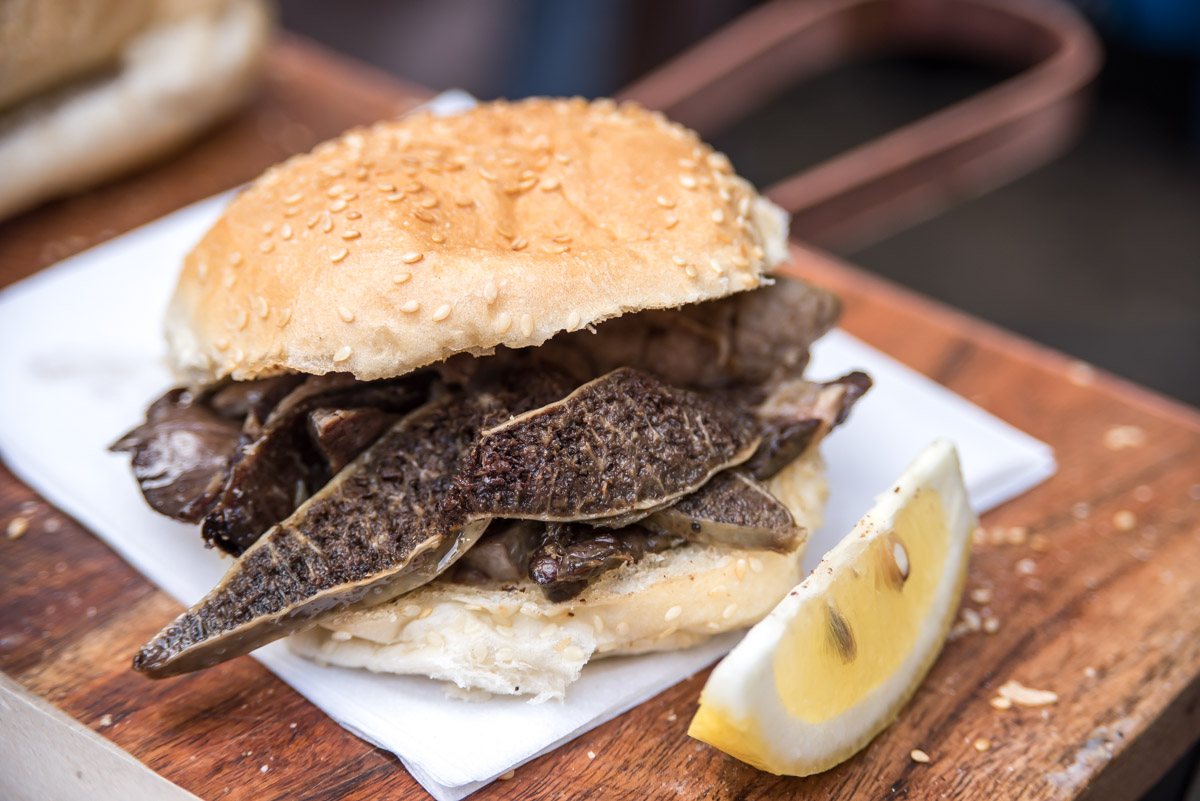
16. Remove clutter and fill the frame with food
When finding a suitable background is challenging – trust me, I get it – then the best thing you can do is to get really close to your food.
This will make sure you remove unwanted clutter and distractions from your frame.
Pair getting close with shooting overhead and ta-dah!
All the busyness in the background disappears in favour of a much more unobtrusive background where the food is the star.
17. The best props for street food photography
Street food, by definition, is served on the street in disposable containers.
What we’re working with here is often ugly AF plastic or paper wrappers, utensils and holders.
If you’re extremely lucky you might find some cuter bamboo utensils but don’t count on it.
So how do you make food photos interesting without using props?
Again, the key is being creative with what’s available around you.
Try to identify the stalls with the cutest paper napkins, the better cutlery sets, and the most photogenic paper wrappings and ask for some clean ones.
Light brown paper generally works better than the plain white one, choose parchment paper over aluminium foil, bamboo cutlery is cuter than plastic and an organic looking cardboard box is definitely more attractive than the shiny polystyrene ones.
When you have no props, focus on the food and add interest by using food styling in a fun way.
Use ingredients, garnish and mess as your props!
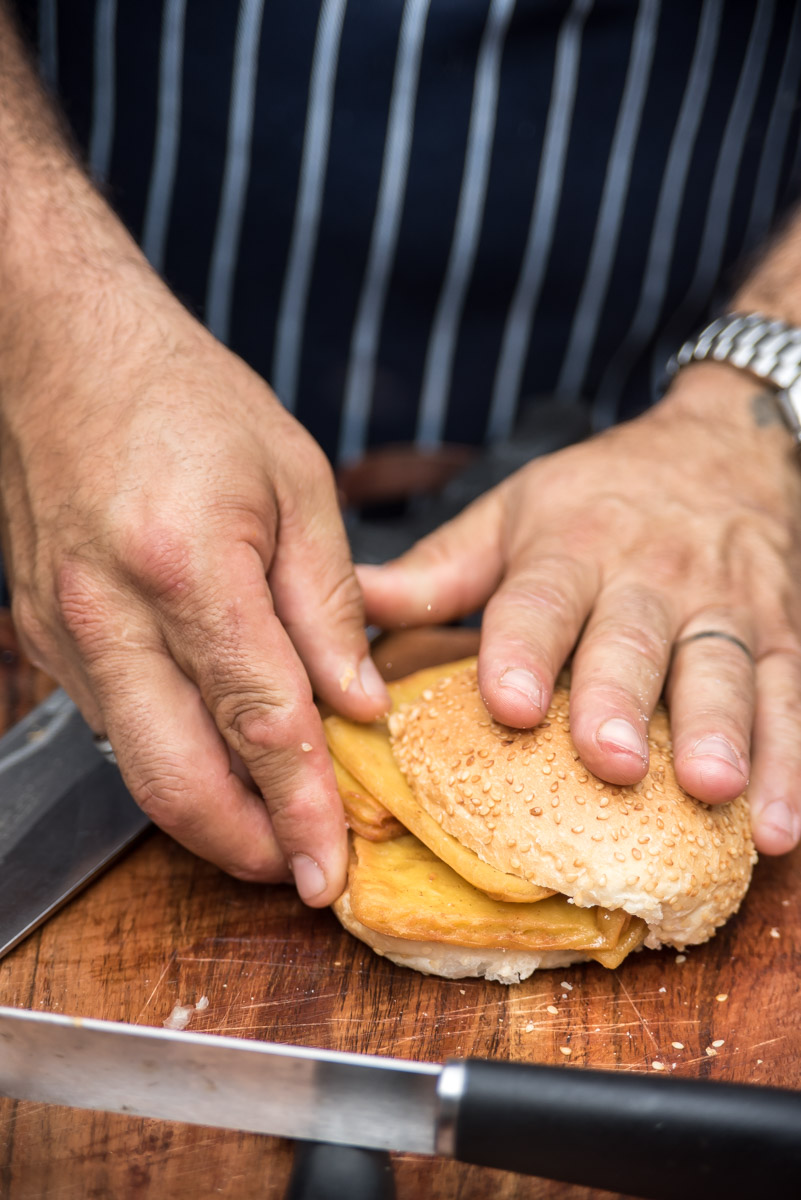
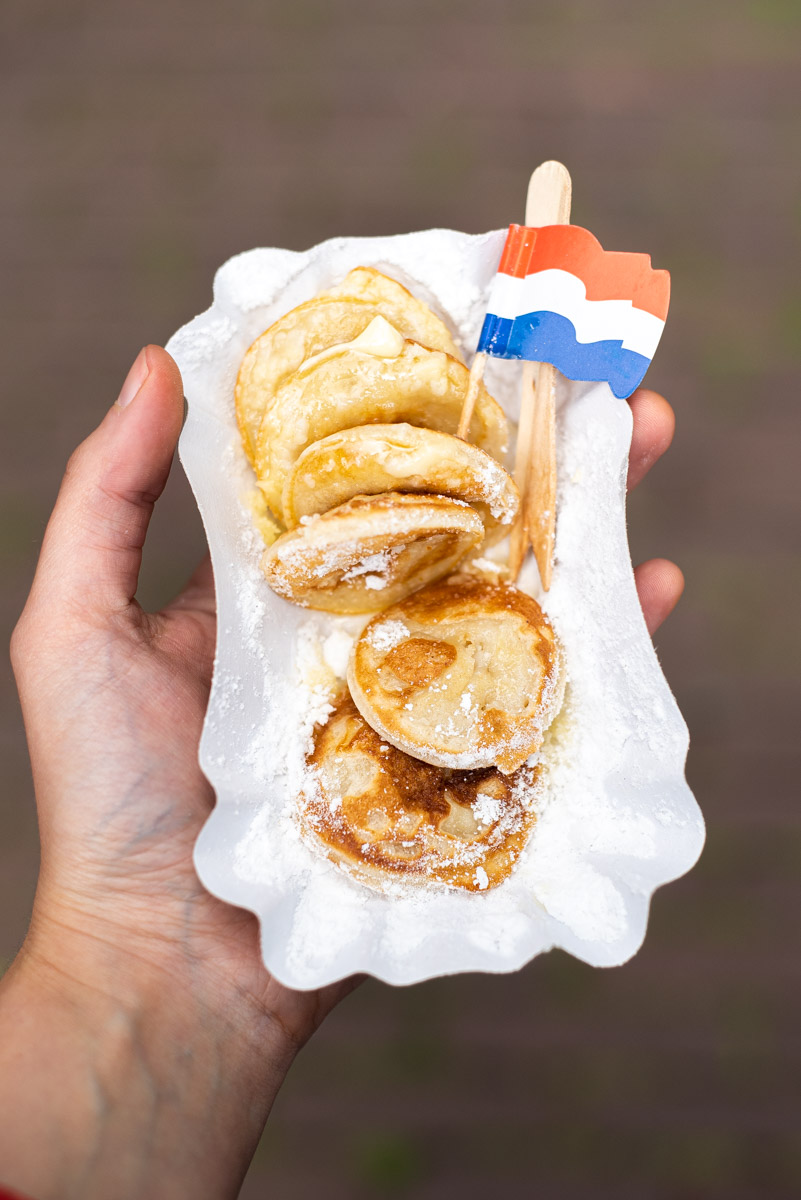
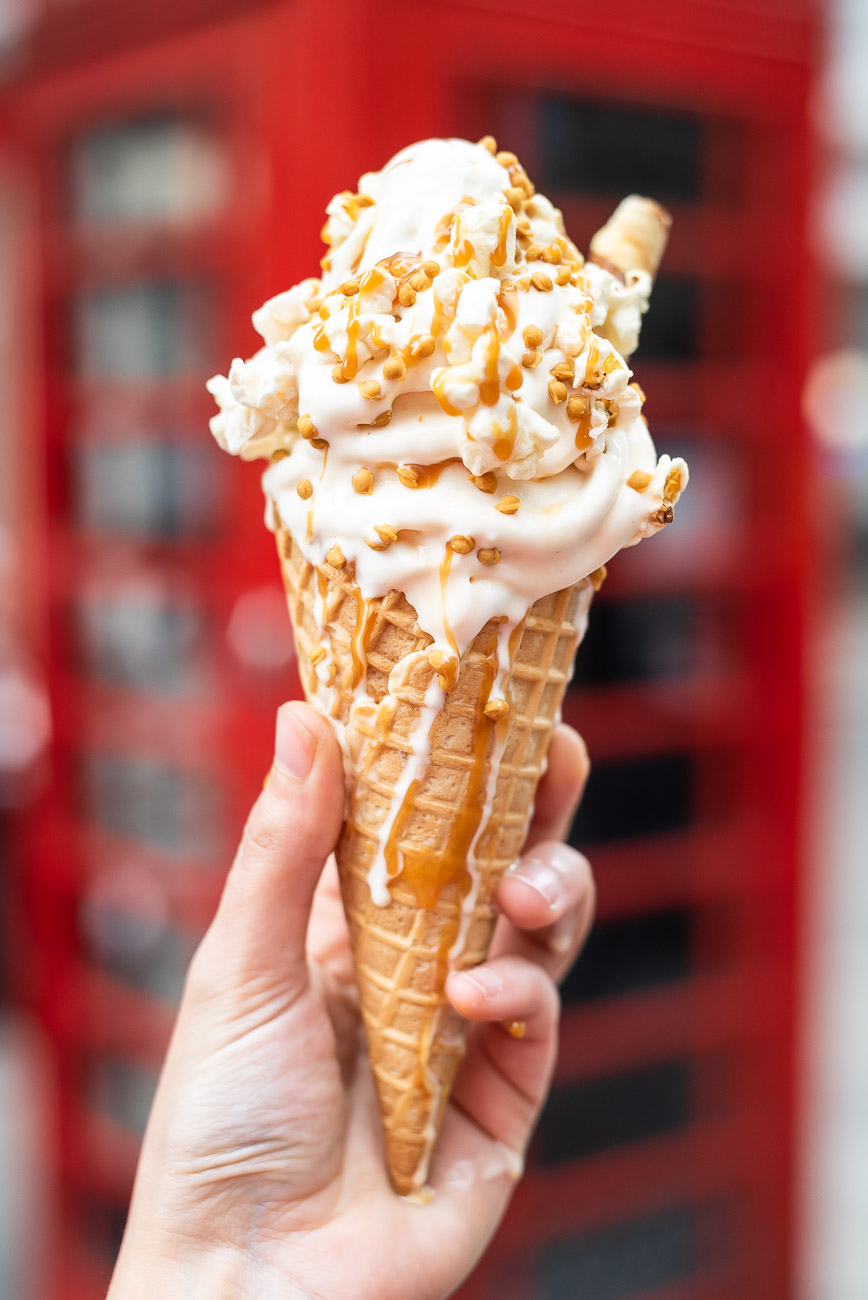
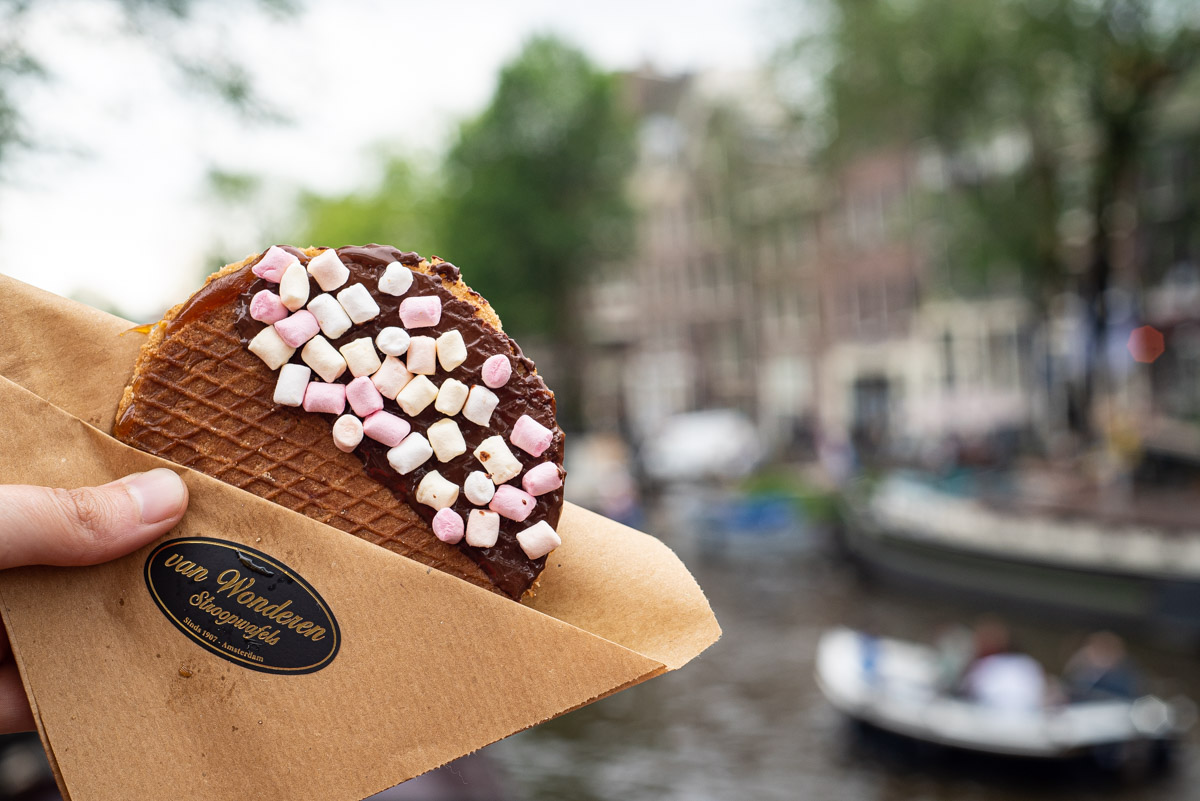
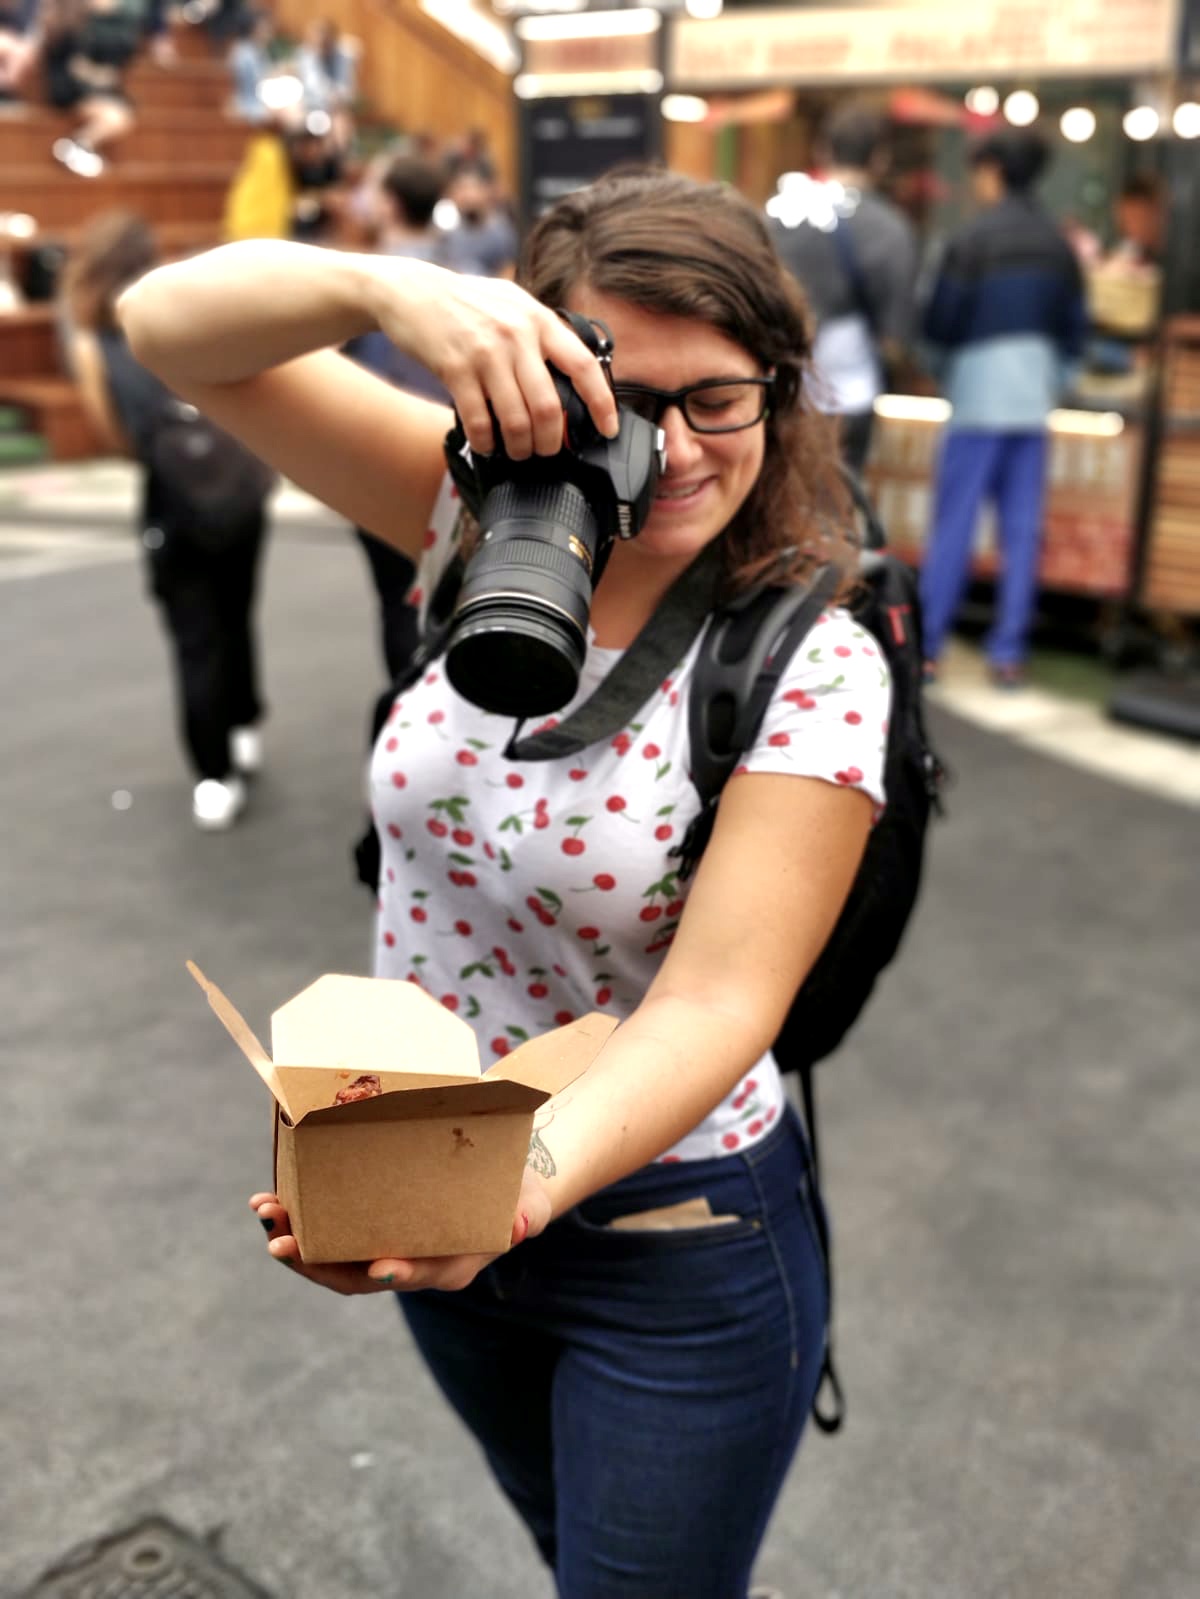
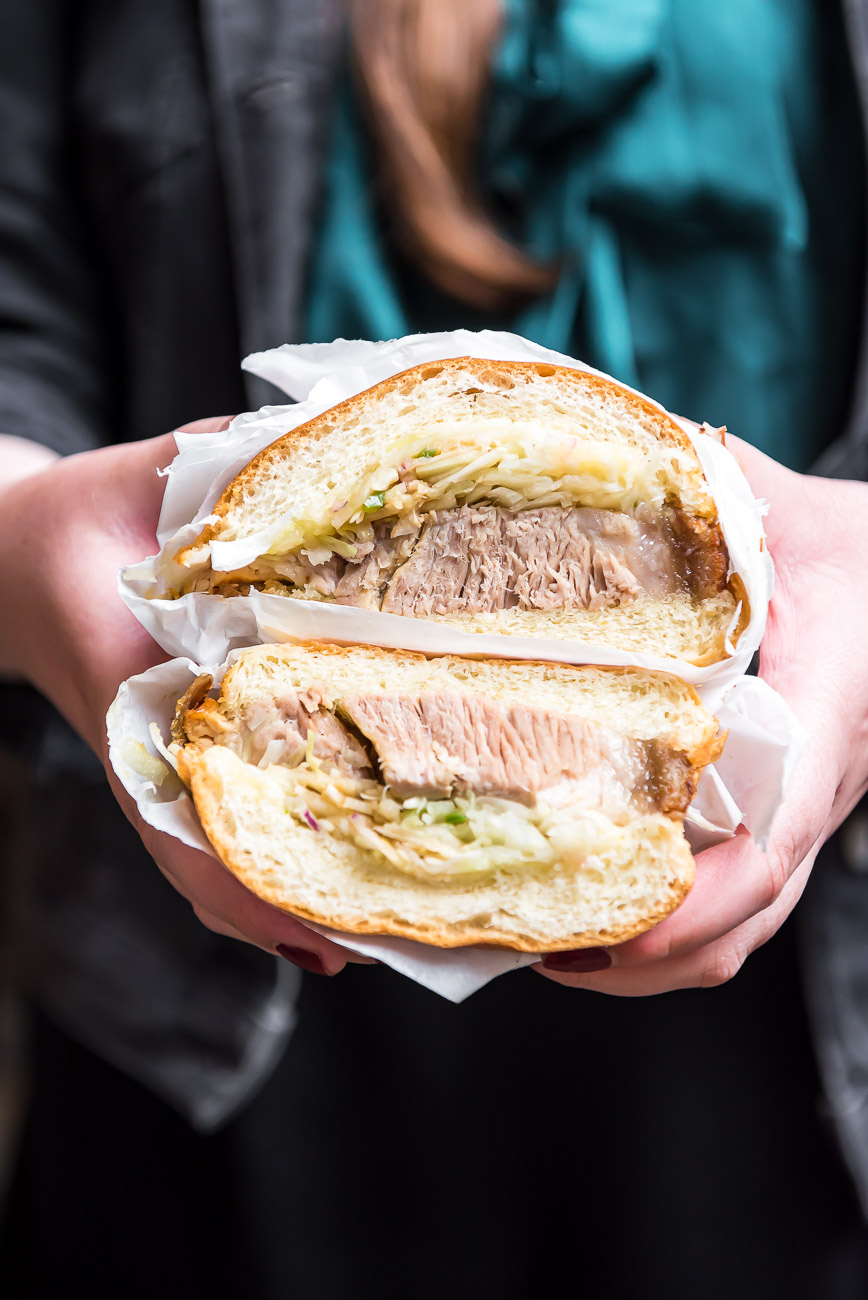
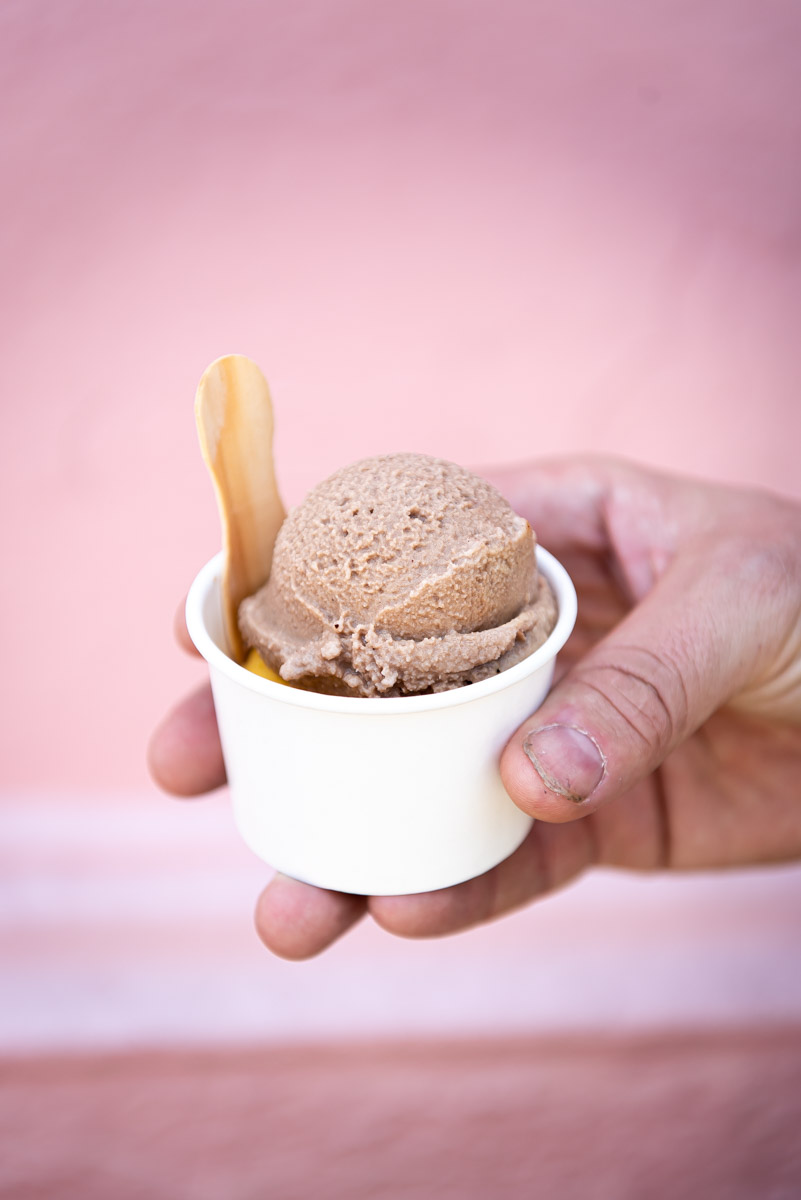
18. Tips for shooting street food when travelling solo
If you really can’t find a suitable place where to lay your food, the answer is simple.
Hands!!
If you’re travelling solo, you might find it tricky to master the art of the one-hand camera holding (it does take some practice, even with the best ergonomic camera ever made) but it is totally possible and here are my tips:
– Have your setting ready before you pick up the food: adjust your exposure and set your focus point to dynamic and continuous
– Focal length: use a 35-50mm lens which gives you the right angle to get a good frame while holding your subject at arm’s length.
– Use a fast shutter: both the camera and your own hand move so you wanna make sure you avoid motion blur
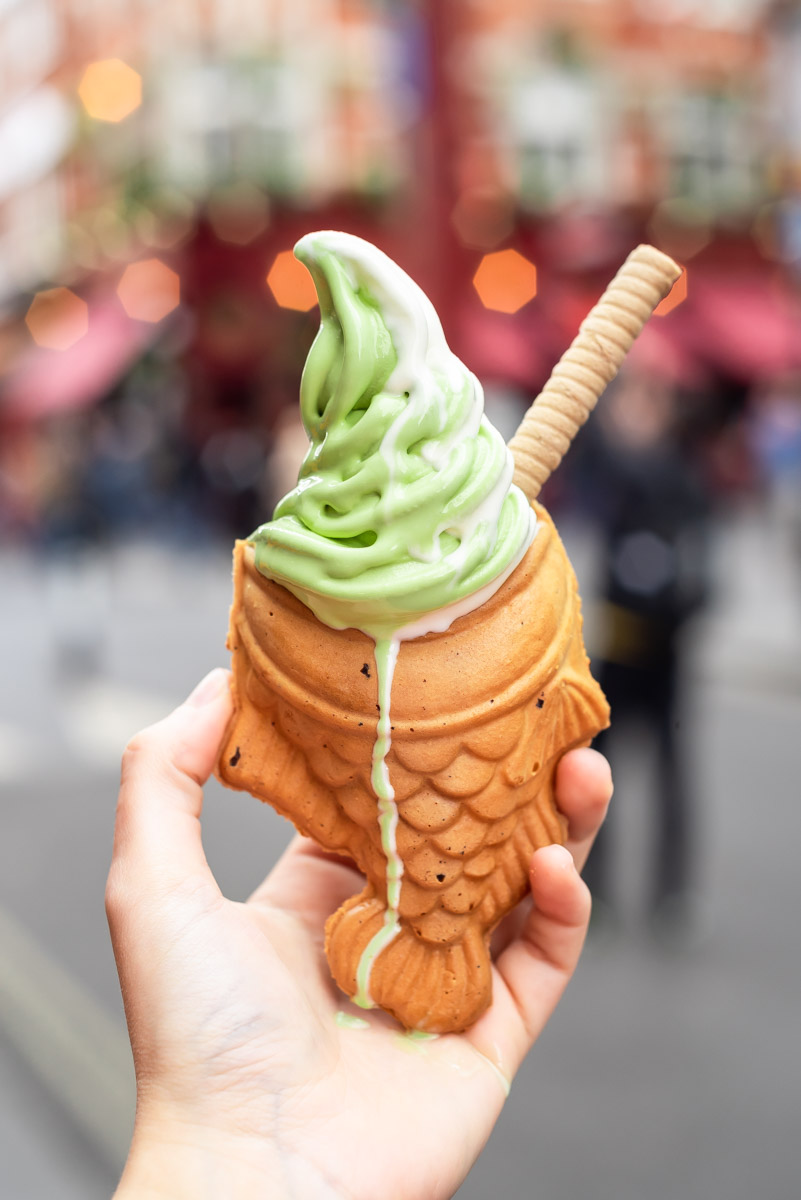
19. Add the human element to street food photography – ask for help
Having hands in your photos really makes them stand out and interesting.
If you’re travelling with friends or family, great!
They’re probably already used to you asking them to hand model for you in exchange for some yummy food.
If you’re travelling solo, you can always ask vendors and chefs preparing your food to “hold it there for a sec” before wrapping it or while they serve it to you.
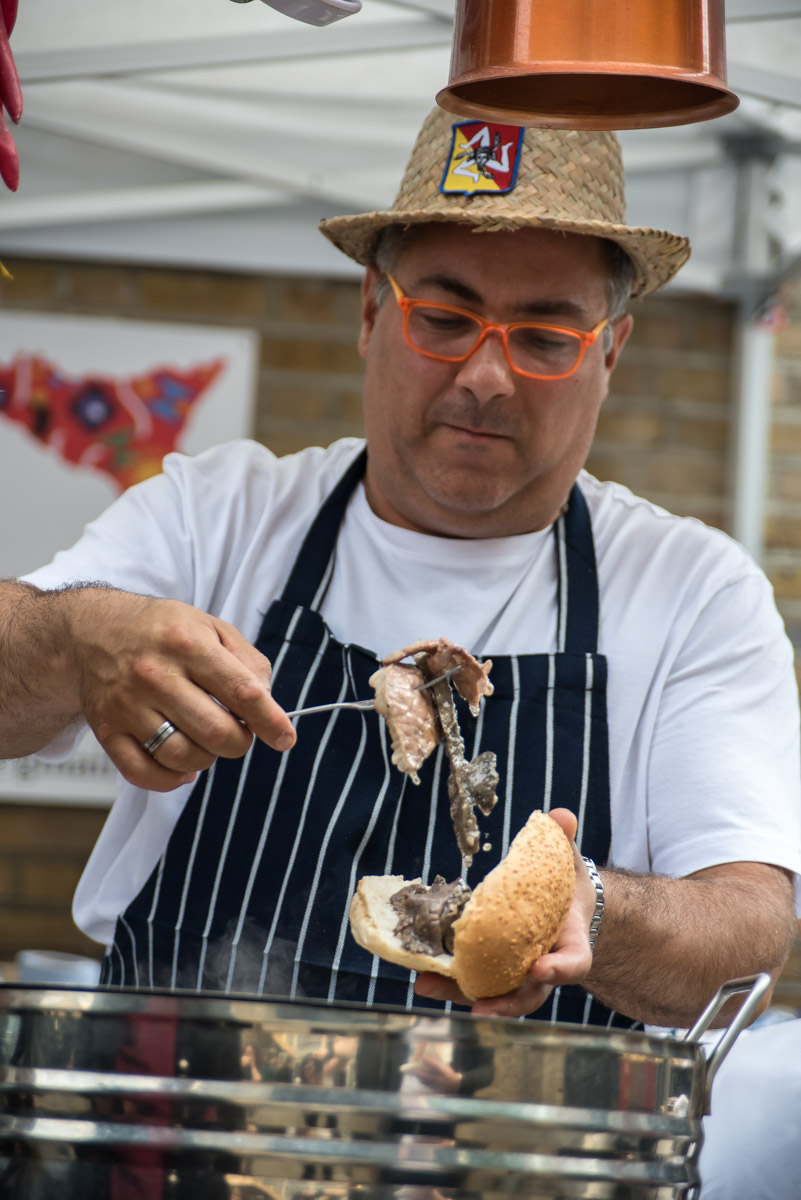
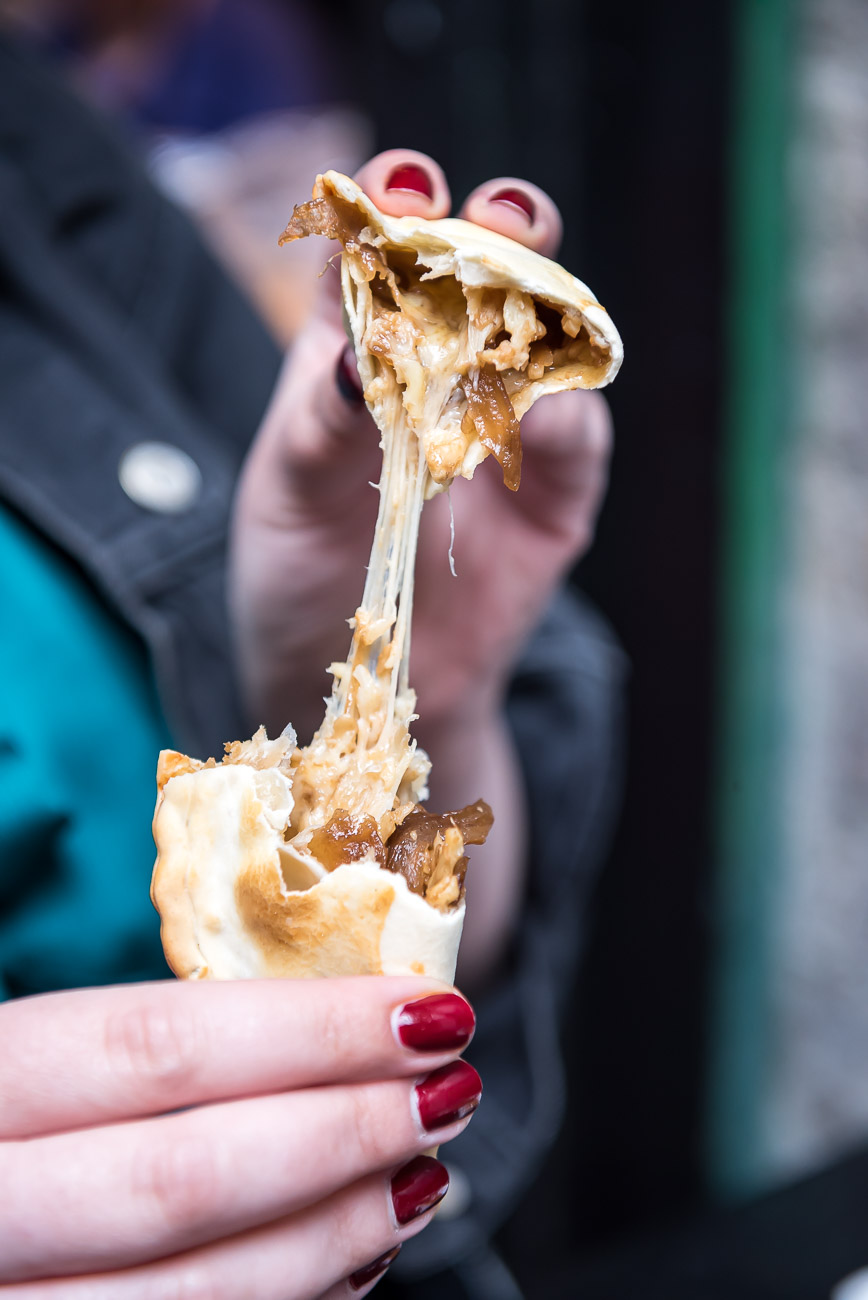
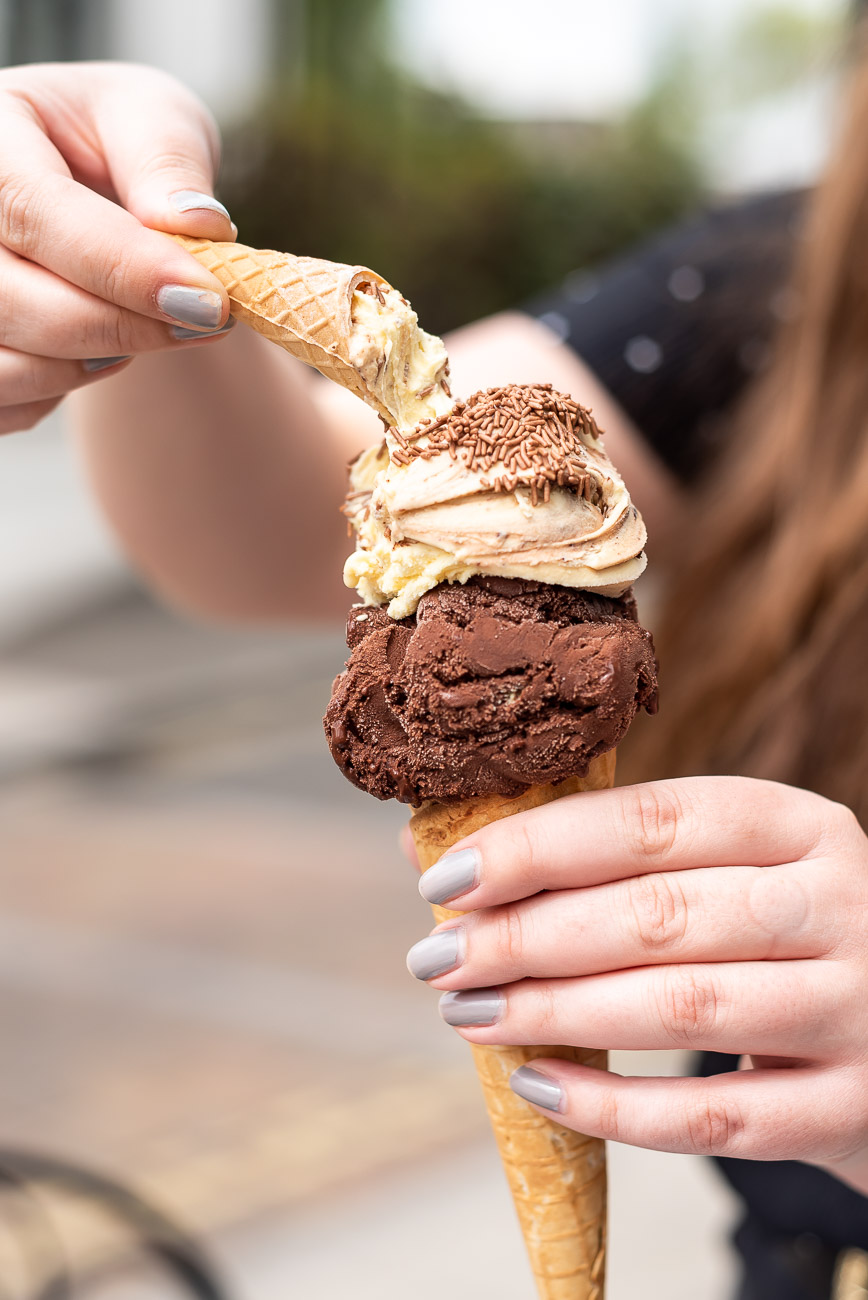
20. Play with your food!
Have you got the shot?
Go on, take a bite.
And then take another shot!
Noodle pulls, cheese pulls, bitten cookies, forkfuls of cakes, broken focaccias… all make for much more interesting and interactive images!
Street food is generally messy – which adds to its magic – so why not embrace the mess and capture the magic in all its glory?
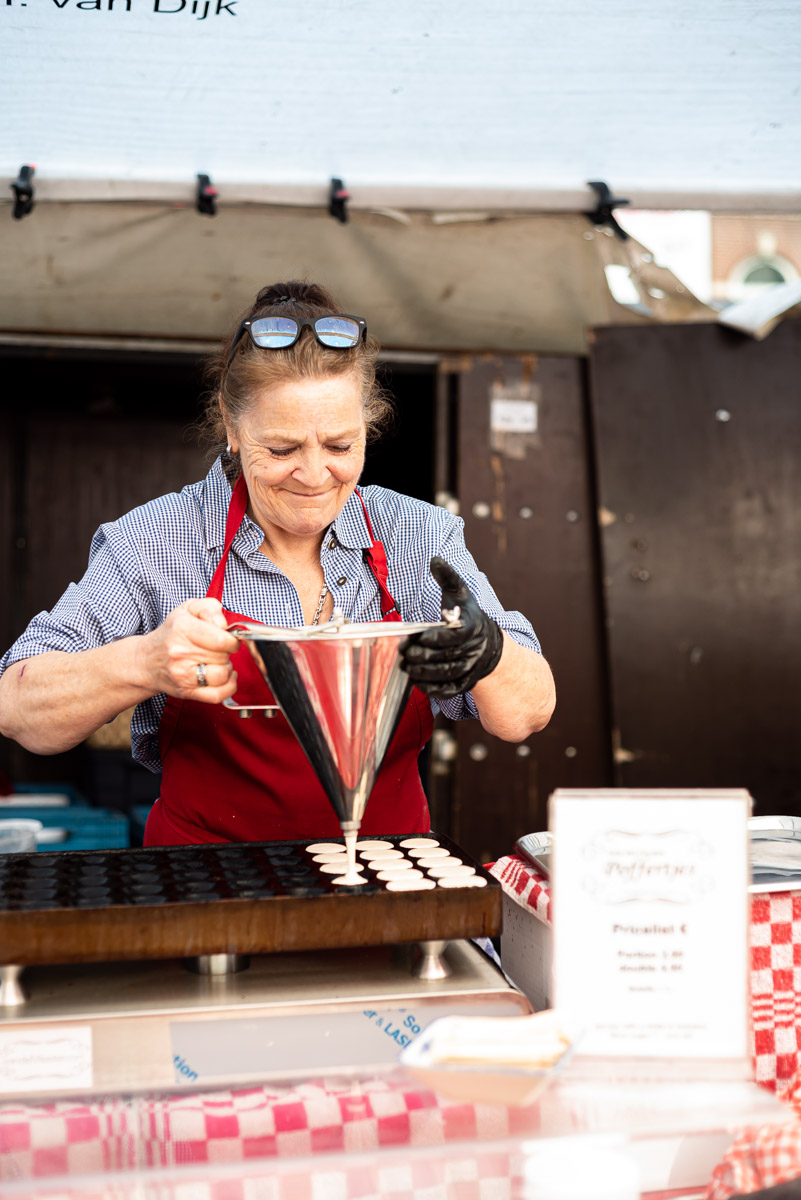
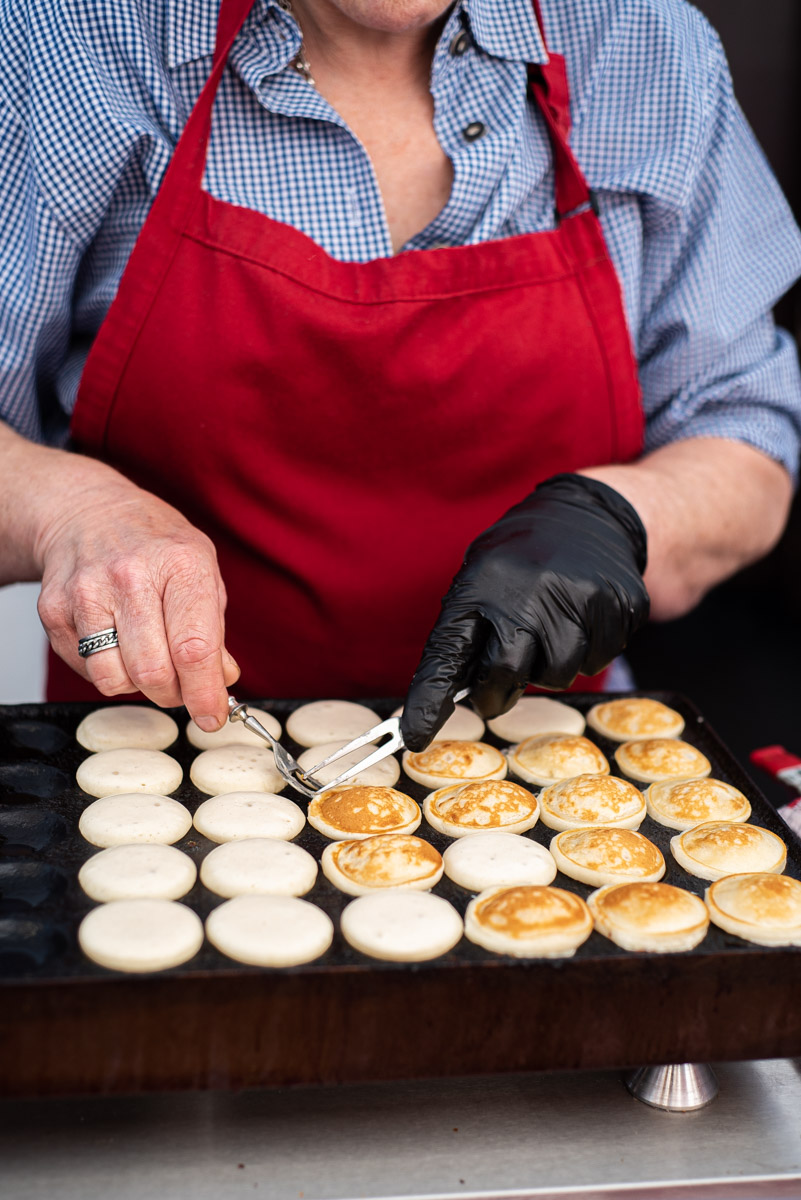
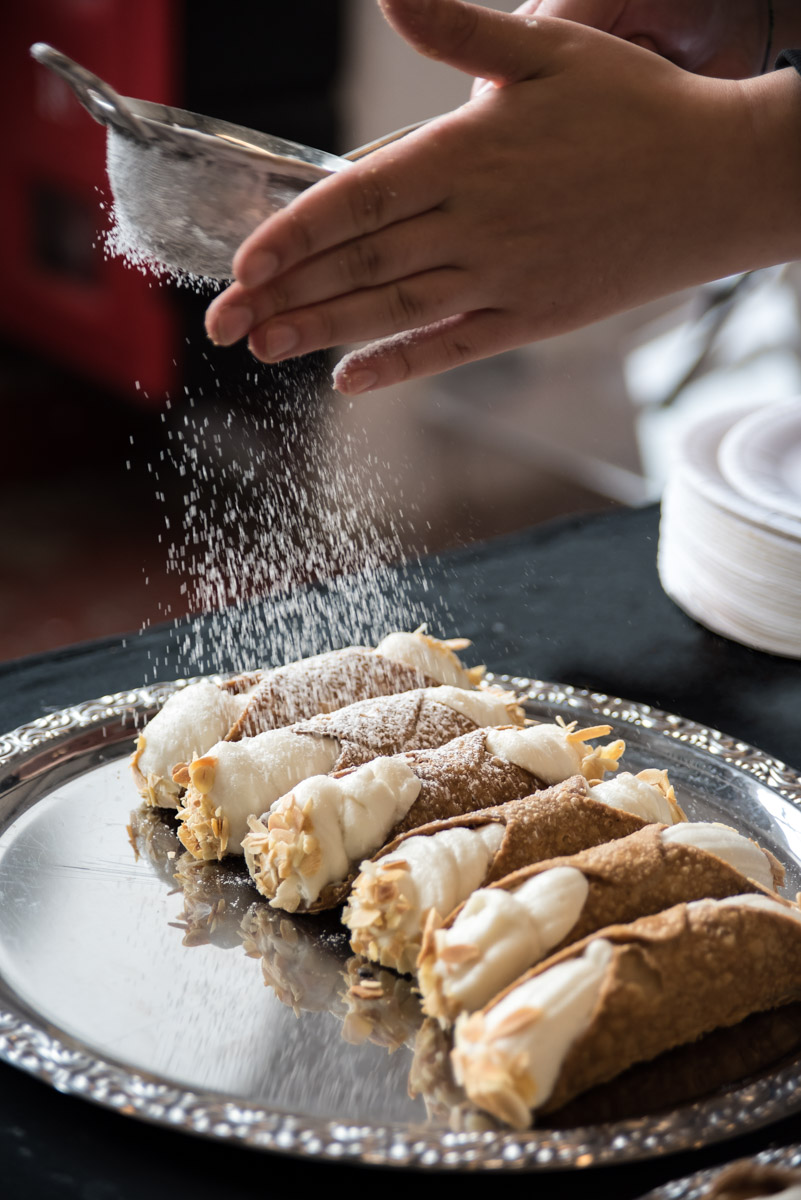
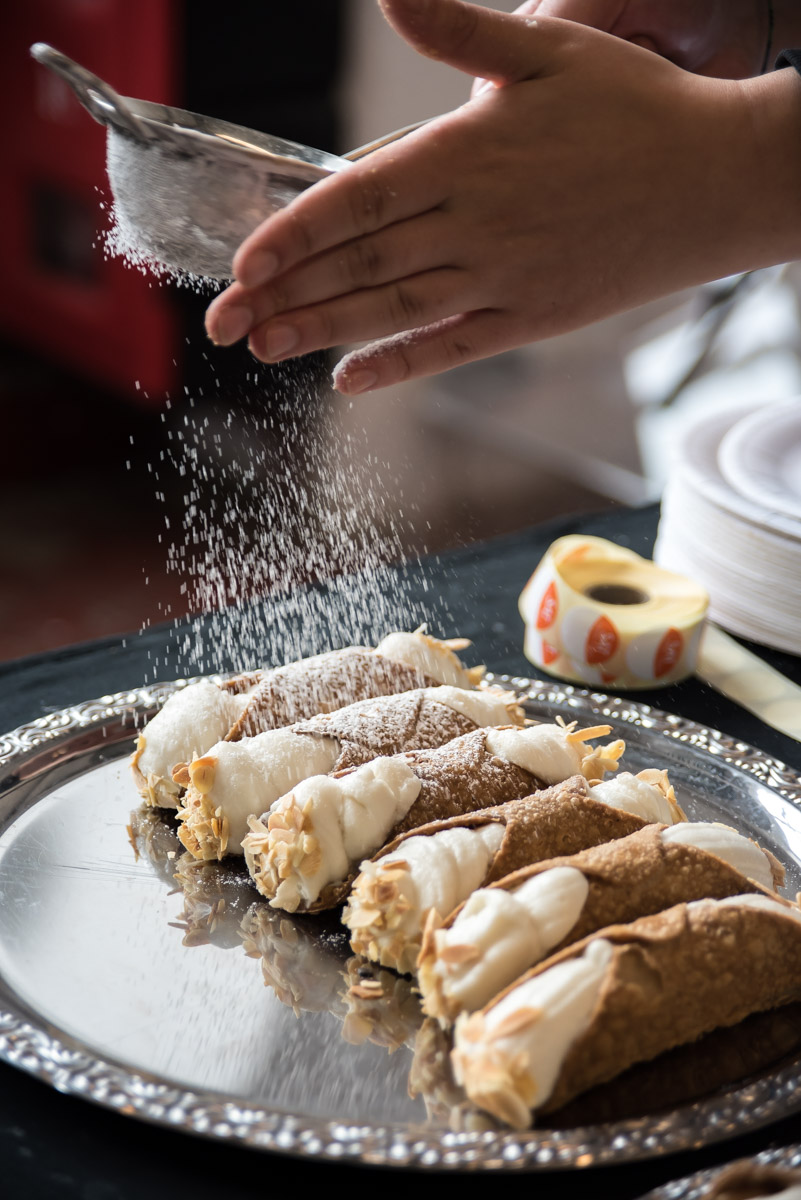
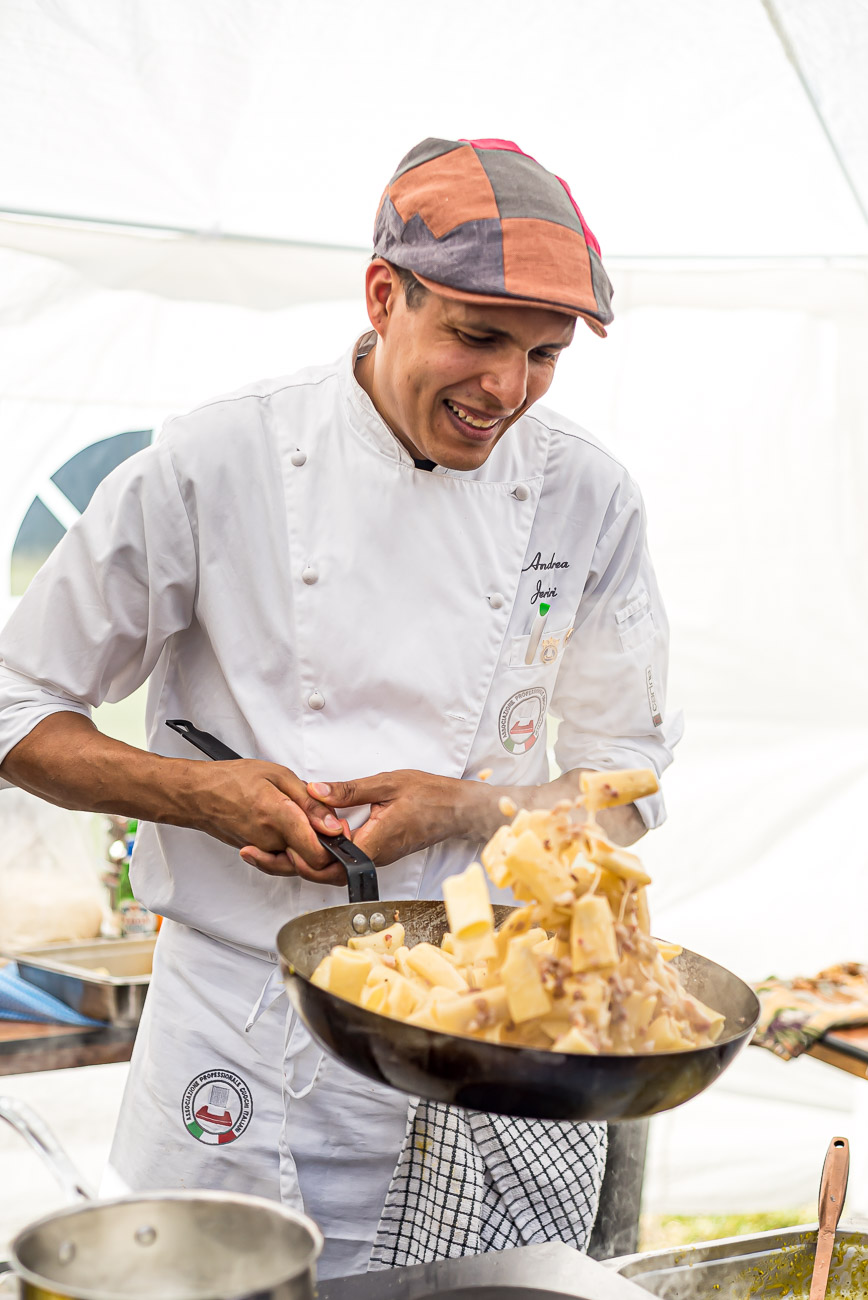
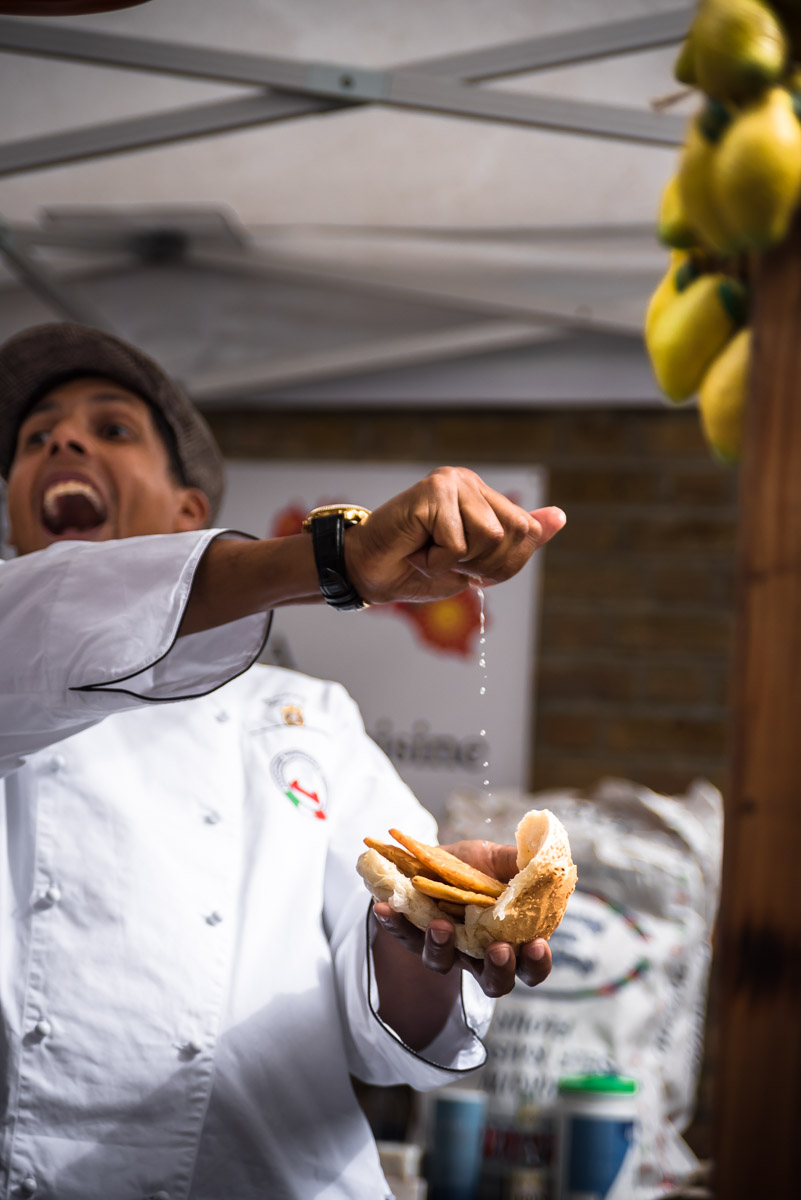
How to take action shots in street food photography
Having a camera with you is a great opportunity for connecting with people.
Especially the people who are making your food!
Are they about to drizzle an outrageous amount of sauce on your dessert?
Are they furiously flipping those fritters in front of your eyes?
Ask them if you can capture the action!
We don’t get to see our food being cooked and prepared often so a great part of the fun of shooting street food photography is capturing the action!
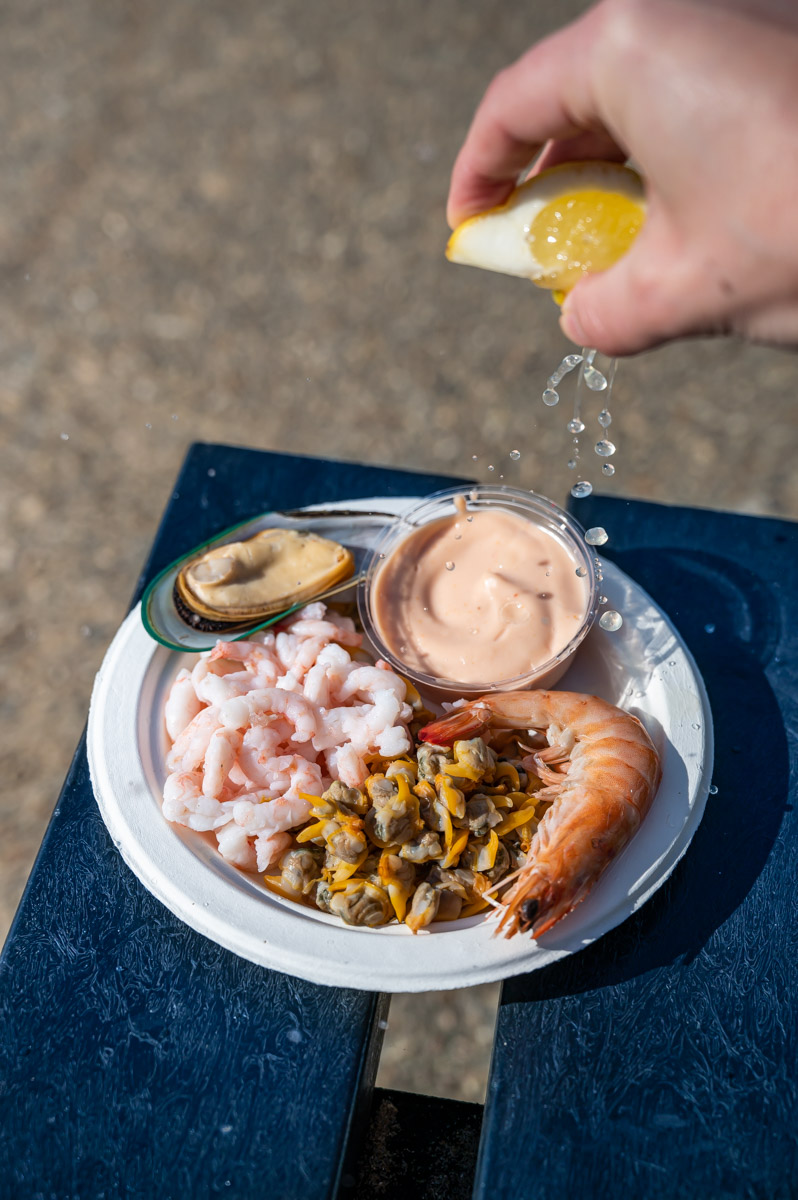
21. Master your shutter speed
The main thing to consider when capturing action shots is your camera settings and shutter speed.
If you want to freeze the action and get jaw-dropping shots of flying ingredients, drizzles and drops, you need a fast shutter speed – anything faster than 1/300sec, the faster the better.
If necessary, you need to increase your ISO or open your aperture.
Another way to capture action is to deliberately convey movement by using motion blur.
In this case, use a slower shutter speed – anything that allows you to not get camera shake. The golden rule is to use a shutter speed that is 1/focal length so if you’re shooting with a 50mm, your shutter speed should not be slower than 1/50 sec.
This will allow you to have a still frame while your subject is the only thing that is blurry.
Editing street food photography
Amazing, you got some great shots.
If you were lucky, the market was outdoors and the light was nice.
Easy peasy editing in Lightroom: play with your curves, give your images a bit of contrast, vibrance, sharpness and done.
If, like in most cases, you encountered some trickier light conditions, you have to work harder to create a good finished image.
Adjusting your white balance and doing colour correction is the most important thing. You want to avoid alien-looking food and you want to make the colour look as natural and realistic as possible
Look at something white in your frame and make sure that it is really white – not grey, not light blue, not yellowish. That’s how you know that your colours are balanced.
Also, you probably had to increase your ISO.
Go ahead and use that magic noise reduction panel in Lightroom. That might come in handy now!
Conclusion
Shooting street food photography can be extremely challenging!
There’s a lot going on and often not much time or tools to realise your creative vision.
Relax, you got this!!
Mainly, remember to enjoy the experience!
Shooting street food is a lot of fun, and eating your subject after capturing it beautifully can be even more fun.
Follow these tips and you’ll leave the street food market not only with a full belly but also with a full soul.
May the light be with you xx
Loved this article?
Pin it for later!
What are the challenges YOU face when shooting street food photography?
Let me know in the comments and I’ll share more tips :)ve a comment and I’ll clear all your doubts!