
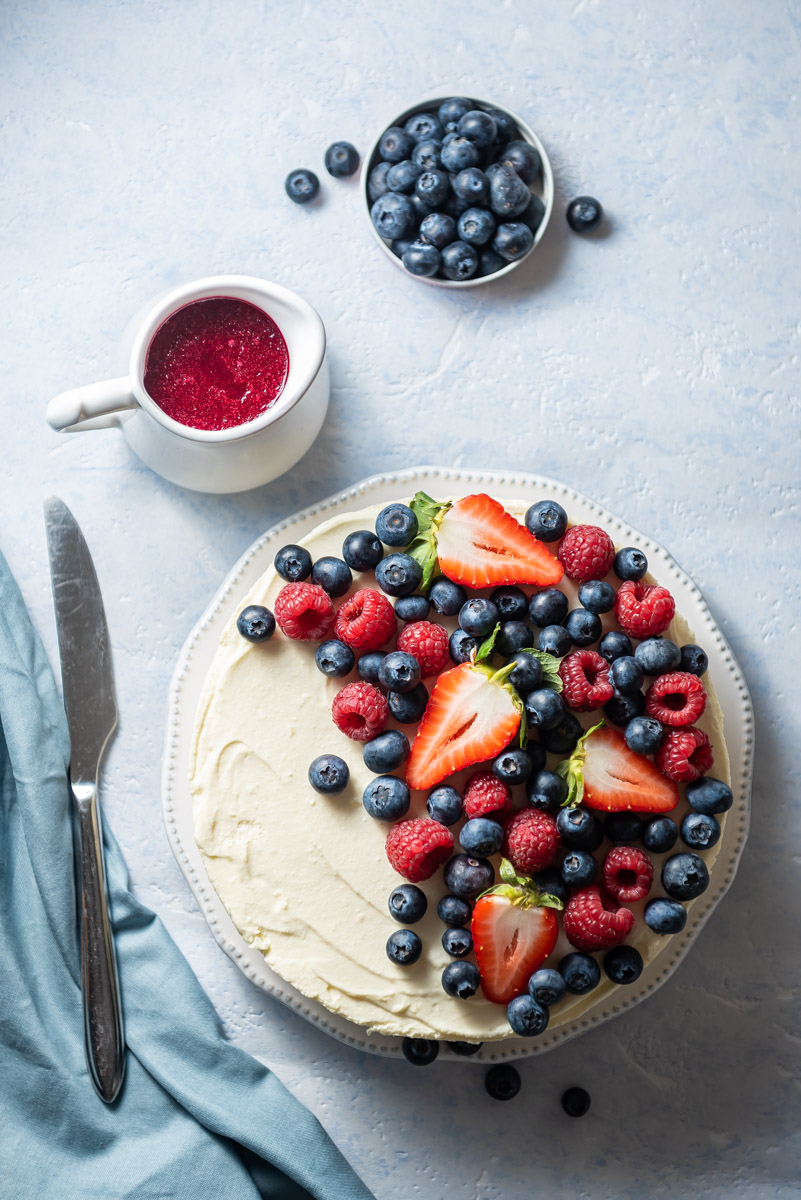
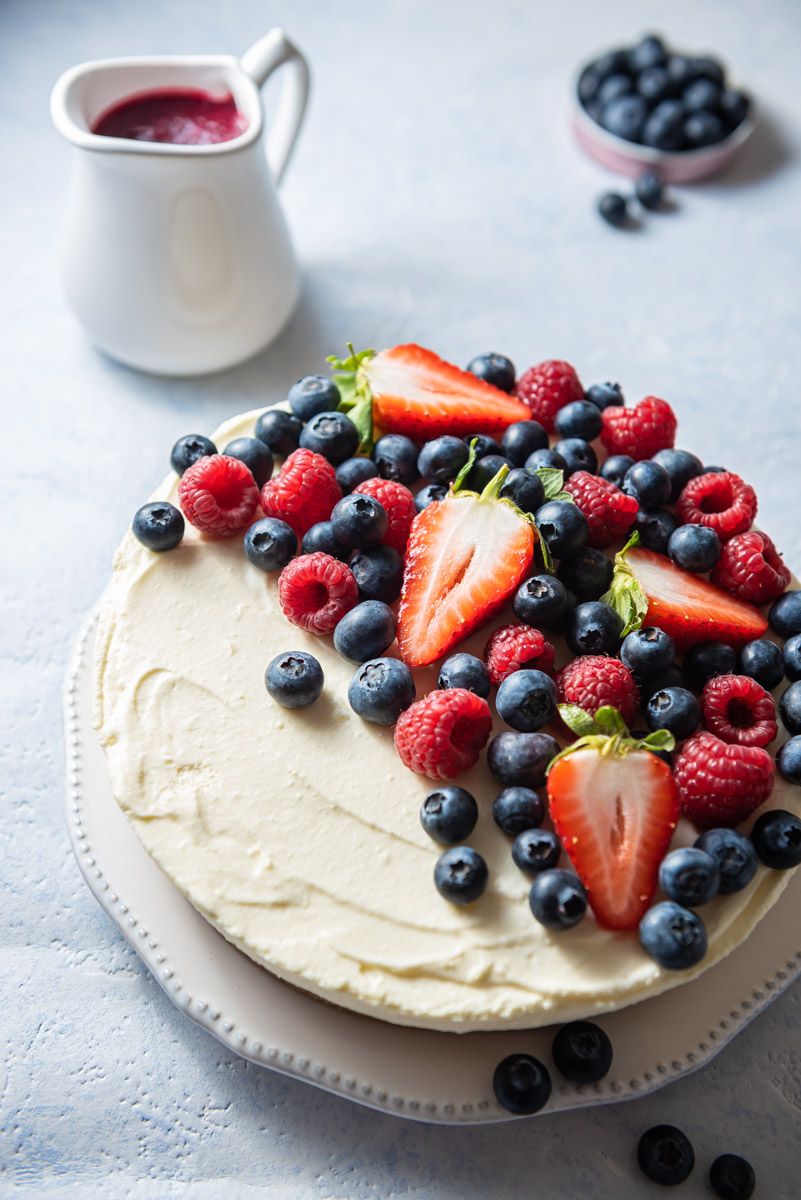
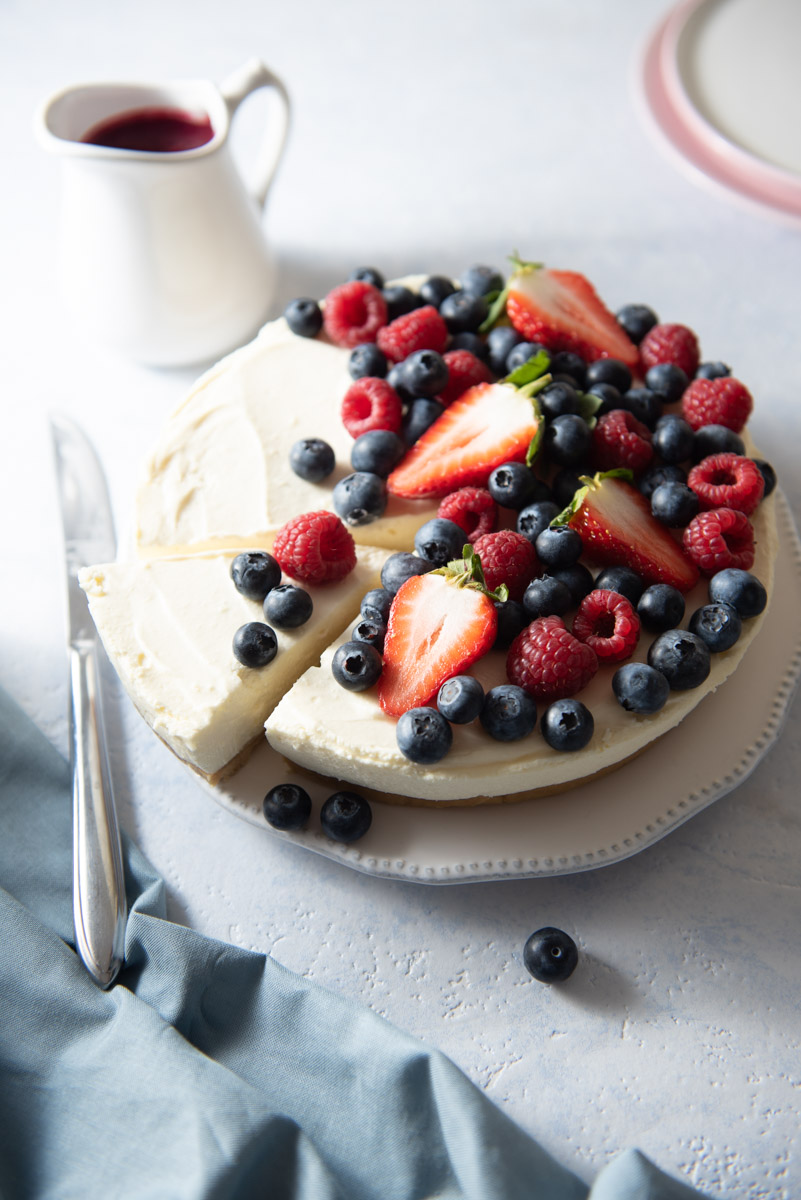
Beautiful food photography with a Speedlite flash – cheap and easy step by step setup
How to create your studio anywhere and take great photos of food with off-camera flash and this hack setup
Are you always chasing the last rays of sunshine to photograph your food?
Wouldn’t it be cool to have a portable sun in your bag?
Today we’re gonna talk about how to shoot beautiful food photography using a flashgun or Speedlite flash.
Don’t worry, I’m not talking about expensive and bulky studio lights.
This is a super simple and cheap off-camera flash setup that you can create anywhere!
It takes up so little space that you can carry it in your bag and suitcase everywhere you go on your travels, in restaurants, on-location, in your kitchen…
You can easily and quickly put it up and break it down so you have more time to create consistently great food images.
Let’s see how in this step-by-step guide!!
- What are the advantages of shooting with a Speedlite flash?
- What equipment do you need and how much does it cost?
- Step by step guide on how to set up your portable studio with flash anywhere
- What camera settings to use when shooting with flash?
- How to set up your Speedlite for the correct exposure
- Editing for flash photography
- Conclusion
What are the advantages of shooting with a Speedlite flash?
Why is shooting with this flash thing so great for food photography anyway?
There are tons of advantages and very few disadvantages of shooting with flash.
Learn how to get the best out of your Speedlite and become a content creation superstar!
Shoot with no sunlight
First of all, having a flashgun means you never have to rely on the sun again.
You have your own portable sun in your bag!
That gives you complete flexibility and control over your schedule and environment – you can even shoot at night!
Or if you’re in a country where days are short, gloomy and there isn’t much natural light (I’m looking at you, UK) you have nothing to worry about!
Portability
This whole flash kit can easily fit in a small bag so you can carry it everywhere.
A great way to travel light and still create top-notch images!
Also, most flashguns run on standard AA batteries – you can set it up anywhere!
Personally, I choose to use rechargeable batteries with a compact charger.
This is better for the environment, and also cheaper in the long run.
If you don’t have juice in your batteries, disposable ones are easy to find and store – in case of emergency you can run out and buy some!
Budget-friendly
This Speedlite kit is affordable, even if you’re just starting out or don’t have a big budget.
The good news is that you can get the whole lot for under £150!
This is also really convenient if you want to carry it with you on your travels.
Not having to worry about losing/breaking expensive equipment will give you peace of mind!
You have full creative control
When using flash, you can shoot at an optimal low iso value, which reduces noise and gives you the best quality images.
Also, you can freely choose the aperture you need to create the right mood for your scene.
Keep reading to see the exact camera settings you need to use!
Create the light you want
With flash, you can manipulate light to make it look exactly like you want!
Want a bright and airy mood?
Want to make your contrast sharper?
Your shadows brighter?
You can!
You can modify light to suit your creative vision with simple tools you have at hand.
Freeze the action
A flashgun emits a very fast and bright burst of light.
This means that your subject is only lit for milliseconds.
If your camera is set up properly, the flash duration effectively becomes your shutter speed.
This allows you to freeze movement and create awesome shots with hands and pours and sexy drizzles.
Shoot without a Tripod
Since the burst of light from your flashgun is so fast, you don’t have to worry about camera shake!
This gives you lots of flexibility in your composition and angles.
And it’s another plus for travelling light!
The one disadvantage (but only in the beginning)
Since Speedlites only light up when you press the shutter, you can’t see how the light hits your subject before you take the shot.
When you’re starting out practising with flashguns, you’ll have to go by trial and error.
Adjust your flash settings, take a shot, see how it looks.
Readjust accordingly and keep fine-tuning until you get the light you want.
Luckily, this is a “disadvantage” only as you’re learning.
Once you are more familiar with using flashguns, you’ll be able to “see” the light in your head.
Don’t worry!
To give you a head start, I’ll explain exactly how to set it up 🙂
What equipment do I need and how much does it cost?
The short answer to both is not much!
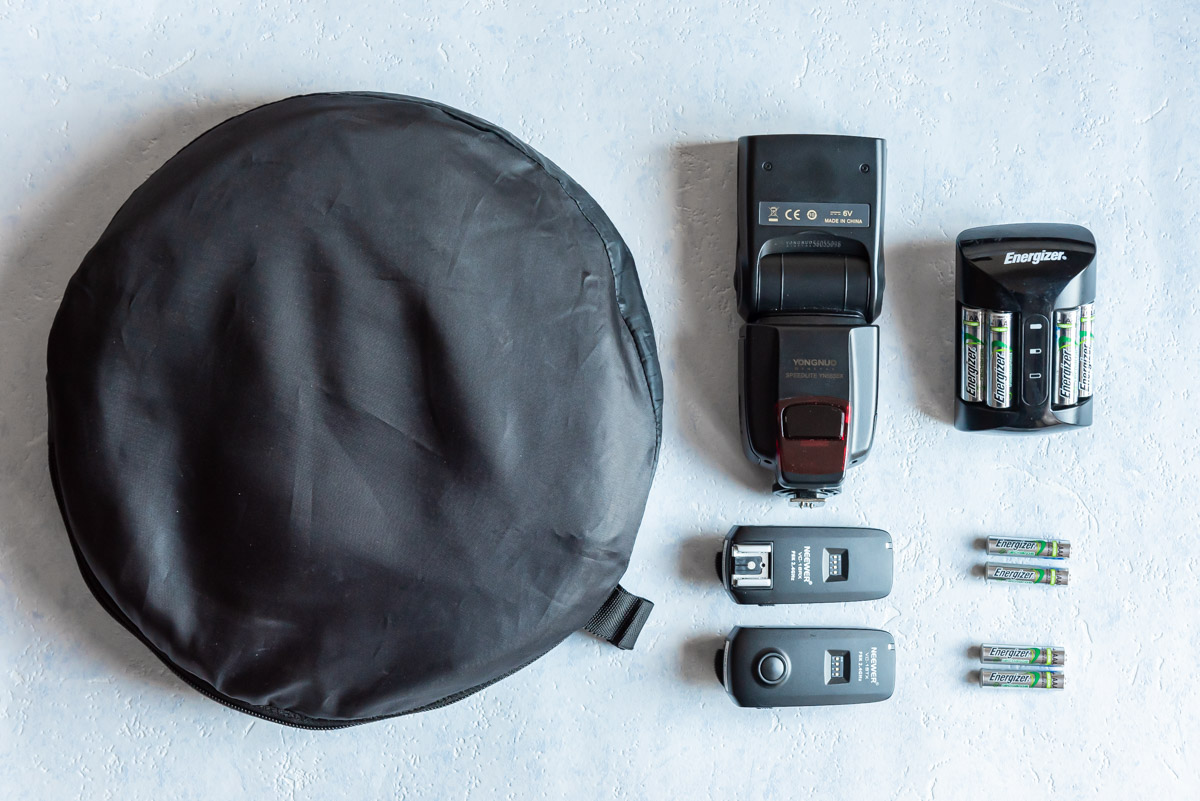
You only need 3 things to build your portable flash studio.
Well, 5 if you want to save both money and the planet in the long run 🙂
This whole flash kit can cost you less than £150!
Flashgun, Speedlite or Speedlight

Flashgun is the generic term, Speedlite and Speedlight are created by specific brands – they’re all names for the same tool.
A flashgun is a small and portable artificial light unit that runs on batteries.
Various brands produce flashguns and I have tested many over the years.
Since I want to keep my kit as inexpensive as possible while maintaining great quality, my choices are definitely Yongnuo or Godox.
Why? Because they perform really well and cost a third of the price of name brands.
This came in handy when I smashed one of my units on a rocky floor – ouch!
We’re content creators on the move and often don’t work in optimal conditions – accidents happen.
Not having to worry about carrying and using expensive gear takes lots of pressure off so you can focus on creating outstanding images!
Ok, not all flashguns are created equal!
When buying third party equipment, you have to check whether they are compatible with the camera you’re using:
Get your Speedlite for Nikon: Yongnuo – Godox
Get your Speedlite for Canon: Yongnuo – Godox
Get your Speedlite for Sony: Yongnuo – Godox
Remote wireless triggers

In food photography, your flash is never – I repeat NEVER – mounted on your camera.
We use what’s called off-camera flash.
Since a flashgun only fires when the shutter is released, your camera and flash need to communicate remotely.
This can easily be achieved with a pair of wireless triggers: the transmitter is mounted onto the hot shoe of your camera, while the receiver is attached to the flashgun.
They also need to be compatible with your camera.
Get your wireless triggers for Nikon
Get your wireless triggers for Canon
Get your wireless triggers for Sony
Foldable diffuser and reflector

This is an incredibly useful piece of kit and every food photographer should have one (or two, or three).
It allows you to manipulate light in 5 different ways while being compact, light and portable.
The white, silver and gold sides reflect light:
place the reflector on the opposite side of your light source and it will bounce light back on your subject, brightening your shadows.
With silver and gold, you get a colder or warmer tone in your shadows, respectively.
White is neutral, and it’s also what generally works best for food.
The black side absorbs light:
place it on the opposite side of your light source to darken the shadows on your subject and add contrast.
The middle part diffuses light:
place it between your light source and your subject to create soft and diffused light with less sharp shadows.
I own three of these: one (or two) between my flash and my subject to diffuse the light, and one on the opposite side to either brighten or darken my shadows.
I am a big fan, but to start you only need one!!
They come in different shapes and sizes and I’ve tried them all over the years.
What I find works best for food is 90cm long, oval shape.
This shape guarantees an evenly lit scene, it’s big enough for most sets and it’s easier to hold up.
Get your multi light modifier
Rechargeable batteries
.


One great thing about flashguns is that they run on standard batteries, and often last enough to cover a full shooting day.
No need for plugs, cables and the whole shebang.
I used Speedlites in a forest while camping!
Extreme, maybe, but it proves a point.
Most flashguns run on AA batteries, while wireless triggers use smaller AAA batteries.
If you want to both save money and the planet, I highly recommend you get rechargeable batteries.
They are awesome and will last you a long time.
You can have a few sets of each and charge them up whenever you have the chance so you can store them and have spares when on location.
Get AA batteries for your flashgun
Get AAA batteries for your remote triggers
Compact battery charger

You’re obviously going to need a charger for your batteries.
My favourite is compact and charges 4 batteries up in 1 hour.
It’s also travel-friendly, it works with a standard cable so you can swap it to suit your wall plug.
Oh, and it can charge batteries on the move with a car adaptor or a USB cable.
Pretty handy!
Get your travel-friendly charger
Ok, your spanking new gear has just been delivered and you feel like a kid on Christmas!
And now what??
Let’s see how to make the most out of your investment.
How to set up your portable studio with flash anywhere – step by step guide
Ready to take your photography to the next level and tackle the sacred beast that is flash photography?
Here’s the secret. It’s not really a beasty beast.
You’ll be able to tame it in no time with this step by step guide!
1. Choose your background and your space.
Pick a place where you want to create your scene.
Wherever you have some space and there’s an interesting background!
Remember, you don’t have to worry about choosing the spot with the best light because we’re gonna create the light!
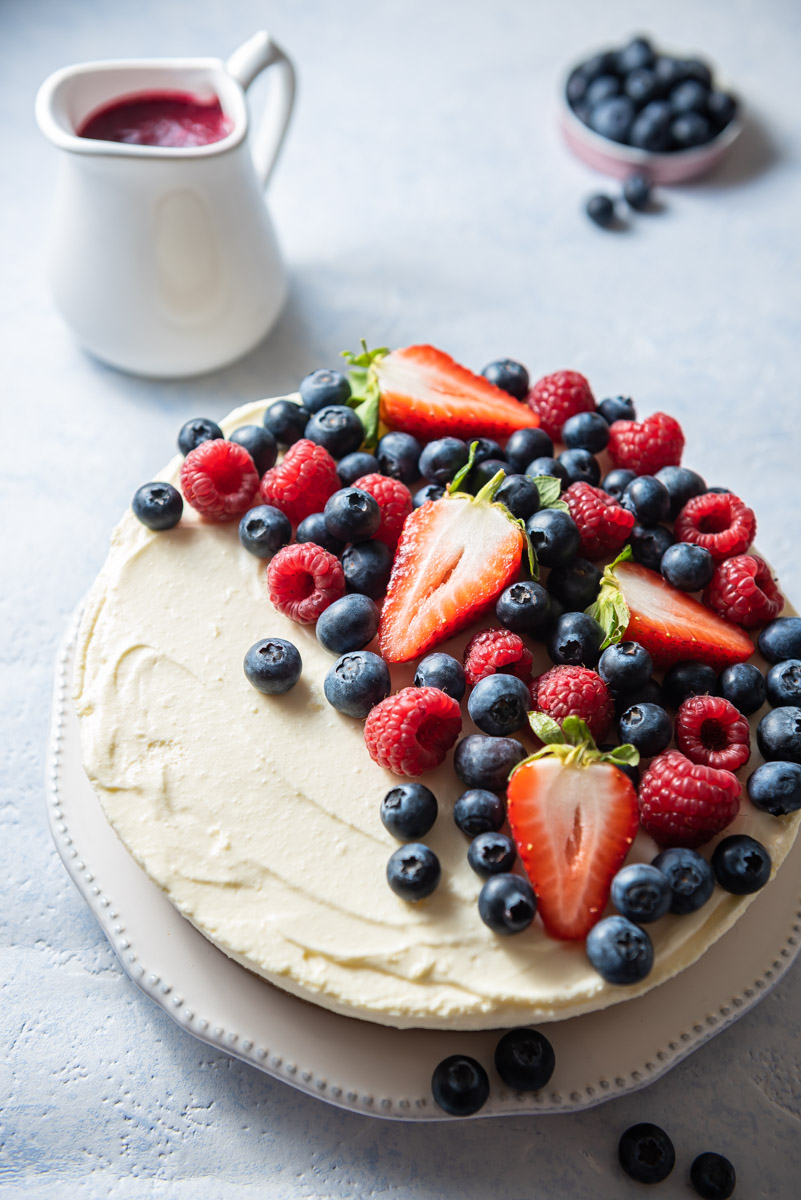
2. Set your scene, props and subject
Arrange your props to create the scene.
Think of this as a draft composition, you’ll refine it as you start shooting.
3. Connect your triggers
Attach the receiver at the bottom of the Speedlite and screw it to secure.
Slide the transmitter in the hot shoe of your camera and secure it.
Make sure both your triggers are set to the same channel or they won’t be able to talk to each other.
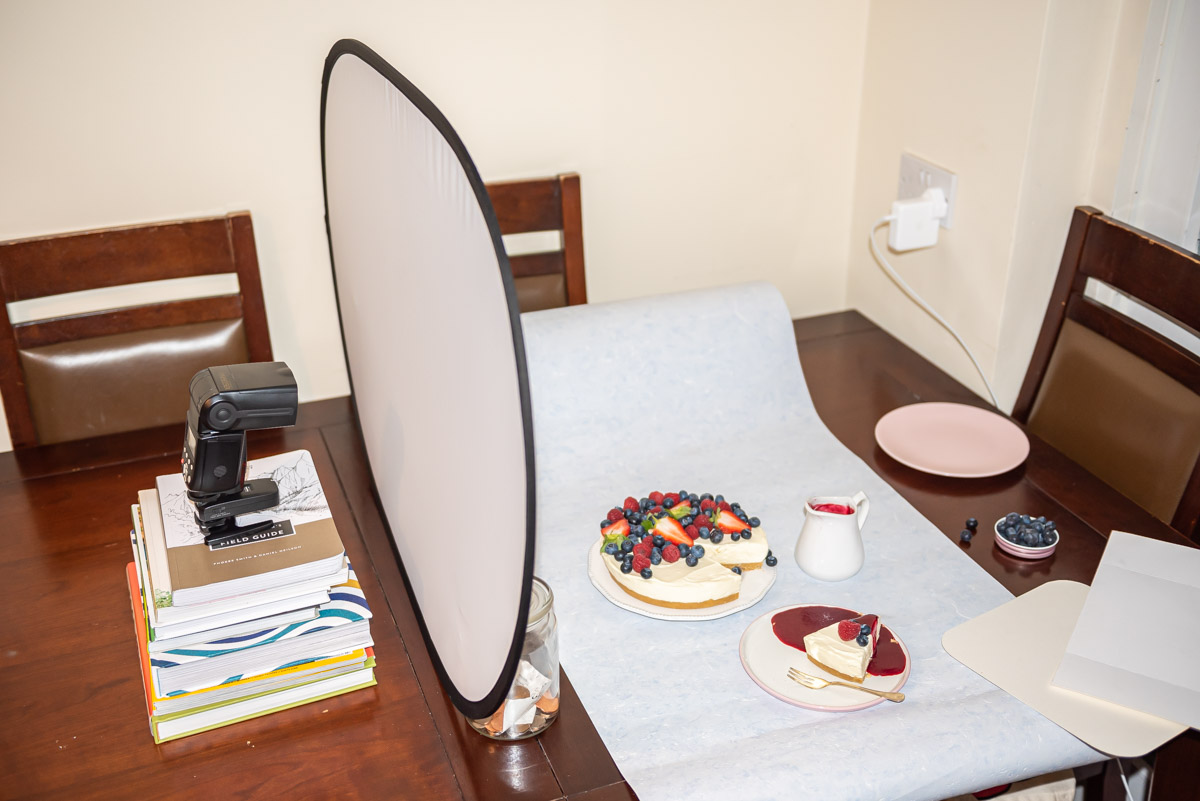
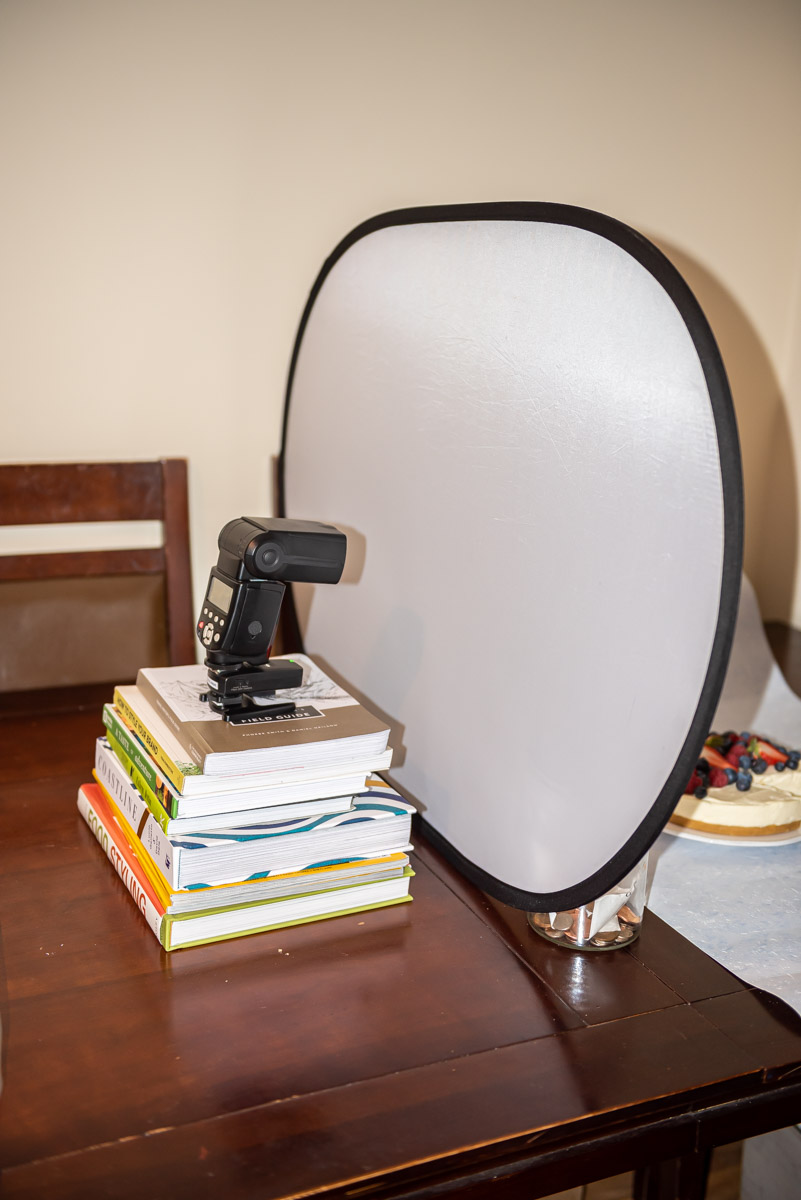
4. Set up your flash
Attach your Speedlite and trigger to the base stand (they come with most flashguns).
Your flash needs to be higher than your surface – about 30 cm to start with.
Stand it on a pile of books, a box, a chair… anything you have available!
As for distance, place it around 60 cm from your subject.
Start with this setup and keep reading.
Below I’ll explain how to tweak the distance and height of the flash to get exactly the light you want!
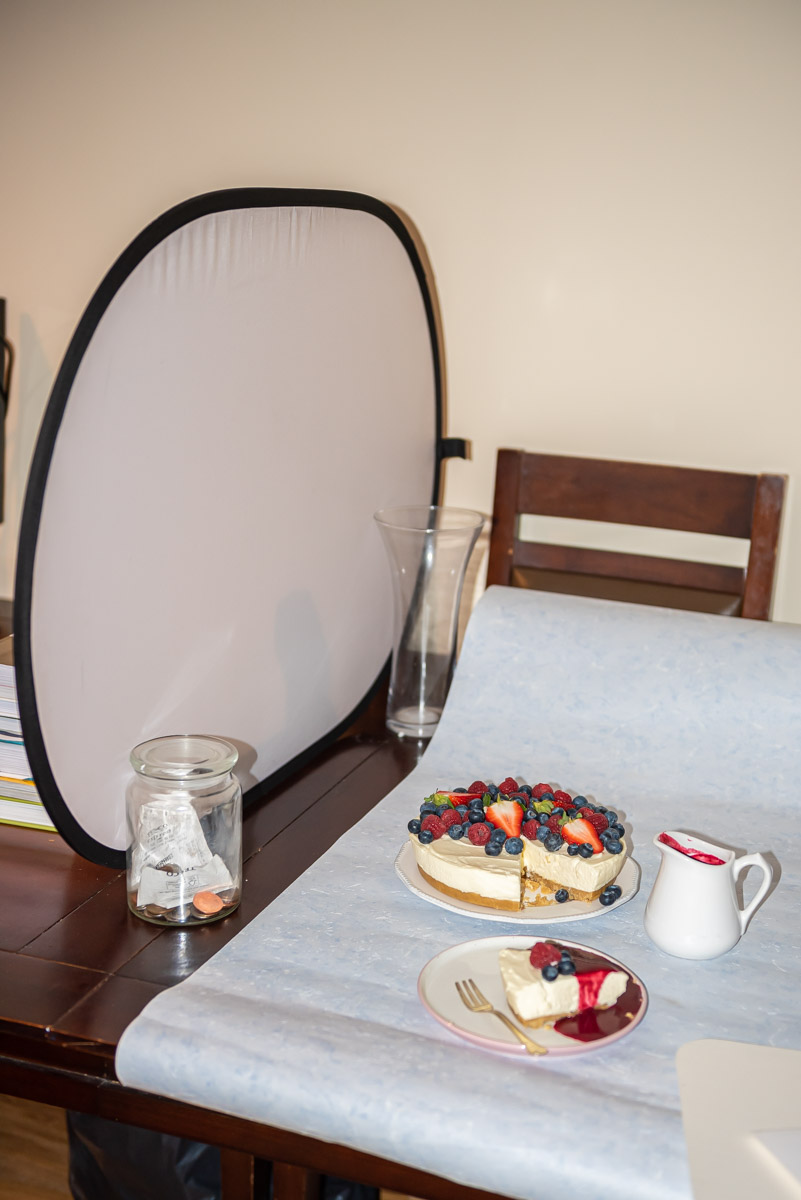
5. Unfold your diffuser
Pop it open and remove the outer reflector fabric.
Place it halfway between your subject and your flash.
Stand it on the table and support it with objects on either side.
Try using glass – it’s transparent and won’t create shadows!
6. Set up your camera and start test shooting!
Congratulations! Virtual high five!
You’re done with your basic setup!!
That took like 3 minutes.
Next you have to set up your camera and take some test shots to get the proper exposure.
Let’s do this.
What camera settings to use when shooting with flash?
When using flash, nailing manual mode is the easiest thing to do!!
So put that baby on manual and keep reading.
1. Set your aperture to fit your vision
If you want a blurry background, use a wide aperture (smaller number).
Vice-versa, close the aperture (bigger number) if you need more details and sharpness in your scene.
This is entirely up to you and your style so be creative!
2. Set your Shutter Speed to flash sync
Flash sync is the fastest shutter speed you can use to make sure your image is evenly lit at once.
This is generally between 1/160sec and 1/200 sec.
If you use a faster speed, you’ll see black bands in your image!
Set your camera to the fastest sync speed allowed.
This will mostly eliminate any effect that ambient light will have on your exposure and white balance.
3. Set your ISO to the lowest value
This will produce the least amount of noise.
Also, it will help reduce the ambient light affecting exposure and colours.
4. Set your white balance to flash
Each flash operates with a specific colour temperature which is usually written in the manual.
Most will have a temperature around 5500K-5600K.
If your camera allows, set the colour temperature as your white balance for the most accurate colours.
Alternatively, set it to “flash” and then fine-tune it in Lightroom (more on editing below!)
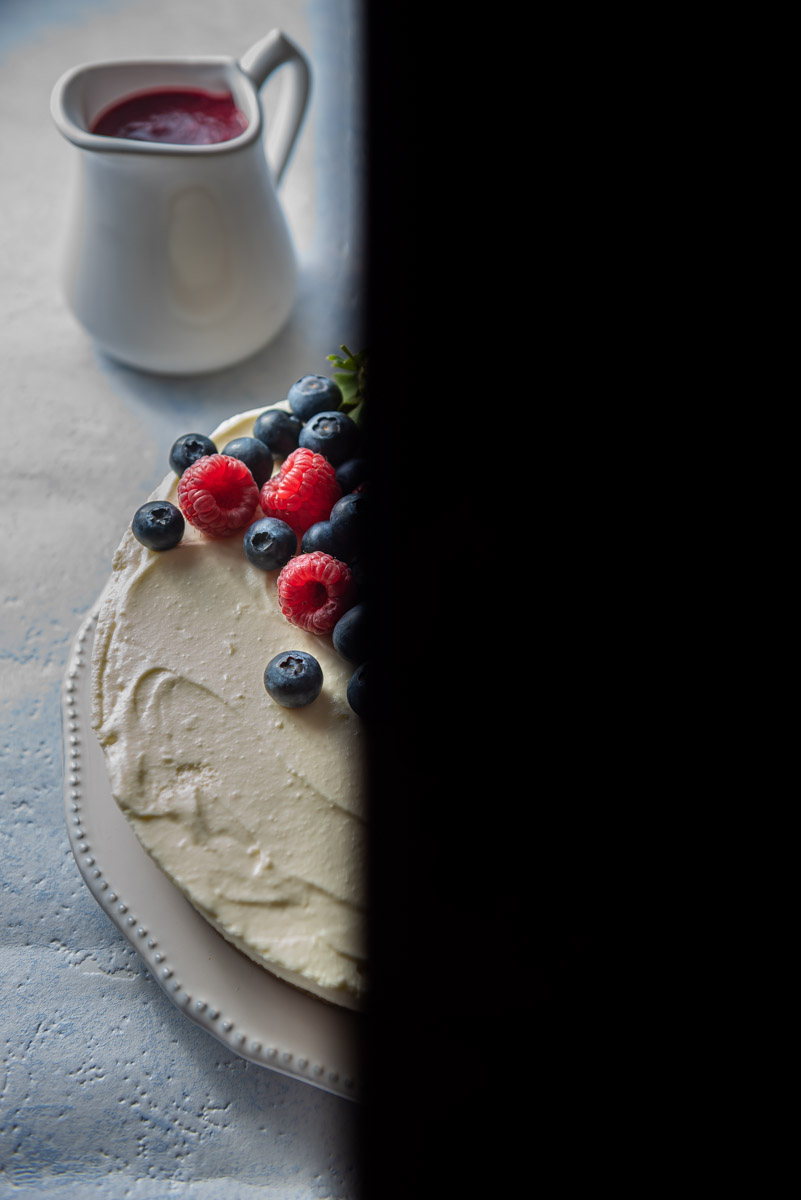
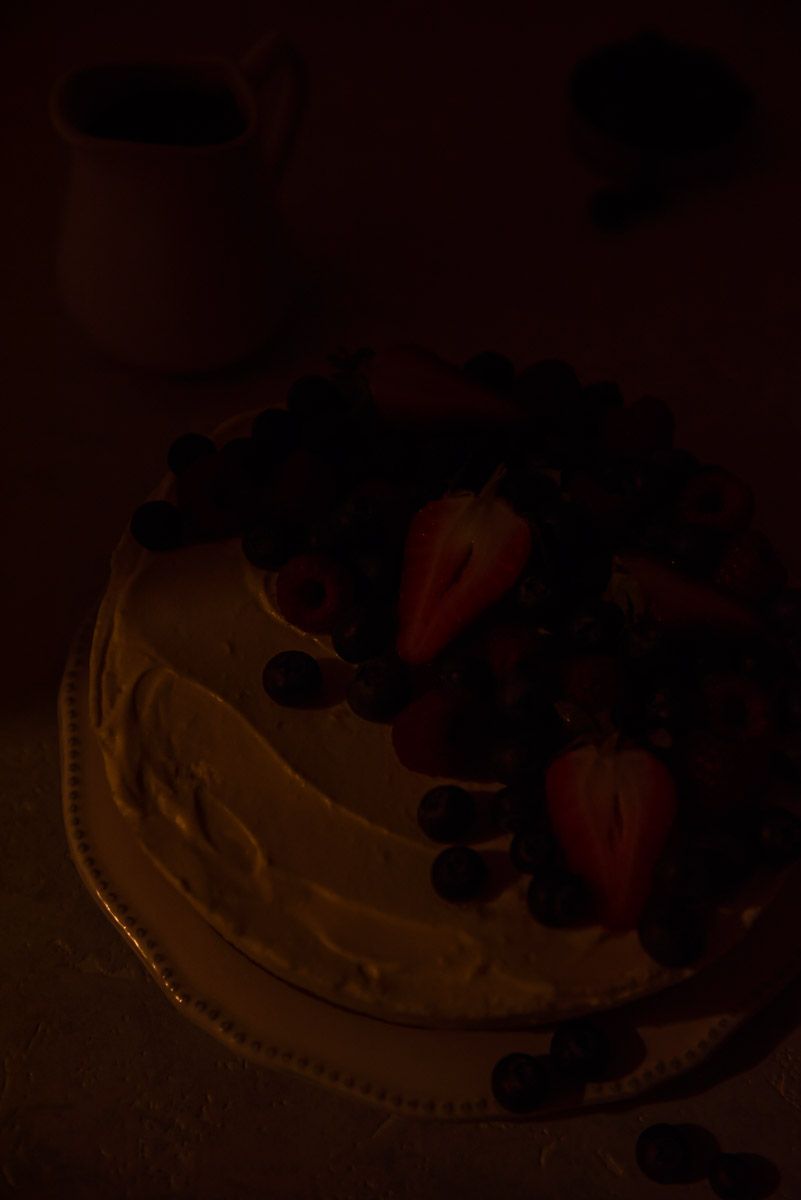
5. Shoot a black image
Turn your flash off and take a shot with these camera settings.
What you want is a completely black image!
This means that no ambient light is hitting your sensor and, therefore, it will not affect your final image.
In this way, the only light that your camera will register is the light coming from your Speedlite.
Now that your camera is ready, you need to adjust the settings of your flashgun to achieve the right exposure.
It’s not scary, and I’ll show you how 🙂
How to set up your Speedlite for the correct exposure
Now it’s time to turn on your flash and have a look at its settings!
Appreciate the magic it can create in your photography.
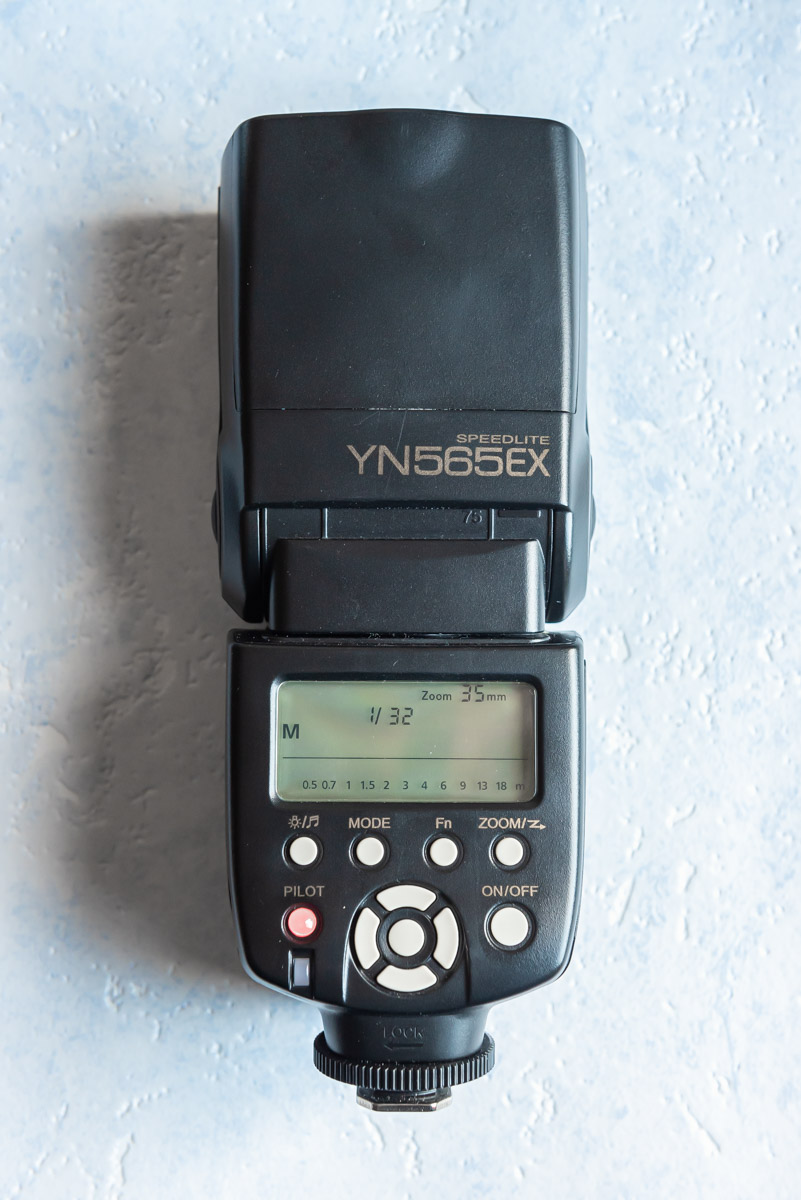
1. Set your flashgun on manual
Most Speedlites have a “mode” button that will allow you to switch between TTL/E-TTL (auto modes) and M (manual mode).
Manual mode allows you to fully control the power of your light burst, therefore your exposure.
2. Set the zoom
The zoom indicates how wide or narrow your light will be, and how intense the burst.
For most food photography scenes, a zoom of 35mm or 50mm is ideal.
3. Set the power
When in manual, you can set the power using your arrow buttons.
The numbers indicate a fraction of the full power – like 1/8 or 1/16.
The full power of a unit will show as 1/1, while half the power is 1/2.
This means that, for example, 1/32 is half as bright as 1/16.
One stop of flash power equals one stop in your exposure.
Most flashguns will allow you to fine-tune your power by using thirds of a stop.
If 1/16 is too bright and 1/32 (half as bright) is too dark, you can set it to intermediate values like 1/16 + 0.3 or 1/16 + 0.7.
The power of each flashgun is different so you’ll have to experiment with yours.
Personally, I recommend you start with 1/16 to 1/8.
This will work for most food setups and most flashguns.
If you can, avoid shooting at full power. This will increase the lifespan of your flashgun.
4. Test and adjust the power
Once your power is set up, take a shot and see how it looks!
Is it exposed correctly?
If it’s too dark, increase the power.
Vice-versa, if it’s too bright, decrease it.
Pretty straightforward right?
Keep testing and adjusting your power until you achieve the right exposure!
It should only take a few attempts and you’ll get the gist of it in no time!

Are you excited yet?
Well done for making it so far! Virtual high five!
I know it’s a lot of info to digest but by now you have all the tools you need to start practising with your flash!!
Editing for flash photography
Shooting with flash will drastically reduce your editing time!
Since you’re able to control the light, your camera settings and your exposure, you can get an almost perfect shot in camera which will require little editing.
In Lightroom, start by setting your white balance to the exact colour temperature of your flash.
This results in optimal and realistic colours – no more yellow or purple images!
The way you edit your images is up to you and your style.
Personally, when I shoot with this setup, I lower the highlights, brighten the shadows slightly, increase the texture and clarity a bit, and I play with saturating some of the colours in my composition to make them pop.
I also increase the sharpness slightly.
That’s it! That should be enough to work for most of your images.
Of course with editing, the sky’s the limit so play around with your creativity and edit as little or as much as you want.
Conclusion
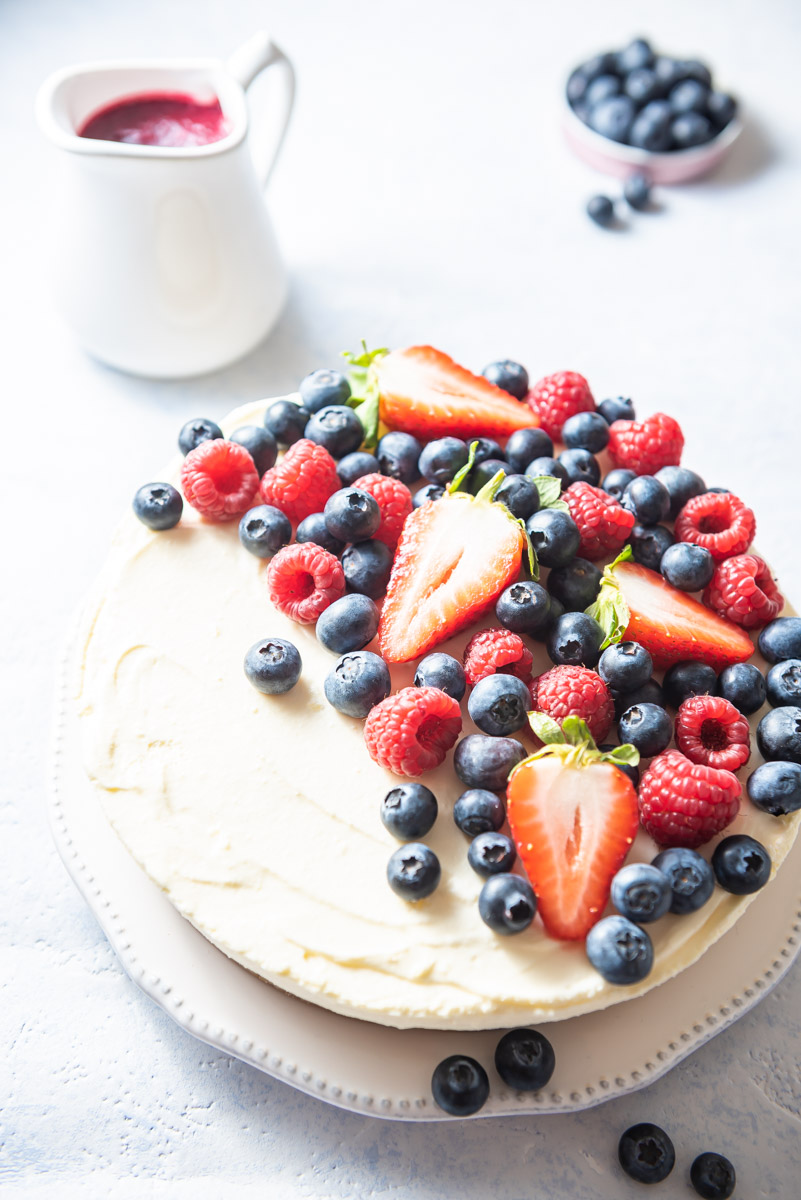
Learning how to use a flashgun to shoot your food photography is a very powerful skill, one that will set you apart from other photographers and give you outstanding results wherever and whenever!!
You’ve seen the many advantages of using flash and how simple it is to get exactly the images and the light you want!
So, learn this super cheap and easy Speedlite hack setup, take your food photography to the next level and create your best work!

Loved this article?
Pin it for later!
Do you still have questions?
I know shooting with flash seems scary at first!
No worries, I’m here for you 🙂
Leave a comment and I’ll clear all your doubts!
That’s a great article, so thorough and detailed! I had been considering buying a studio flash for a good while, but space constraints put me off. So, this is the perfect solution for me…I can’t wait to get started! Thanks Giulia 🙂
Thank you Valeria!!
So happy you found it useful and it has motivated you to finally do it!
Once you go flash, you never go back 😉
Jules xx
Amazing article! keeping it in my fav!
So glad you liked it! <3
Let me know if you have any questions 🙂