
Shoot awesome travel photography with your smartphone easily
10 easy tips to elevate your images even if you don’t want to learn photography!
Whether you’re a travel blogger, travel writer, travel enthusiast, or travel creator, follow these easy tips to immediately and easily improve your travel photography. Even if you’re only shooting with your smartphone!
Shooting travel photography with your smartphone is not only possible but also fun and it can give you great results.
It’s the camera you always have with you and even if you don’t want to get deep into the technical aspect of photography, learning a few simple tips can really help you elevate your travel shots, effortlessly!
Why not give it a try?
Activate the camera grid for easy composition in travel photography
Enabling the grid is probably the easiest and most effective way to immediately elevate your travel photography, especially when shooting with a smartphone.
If you take away 1 tip from this article, let it be this one.
But do read the rest, there’s some gold in here.
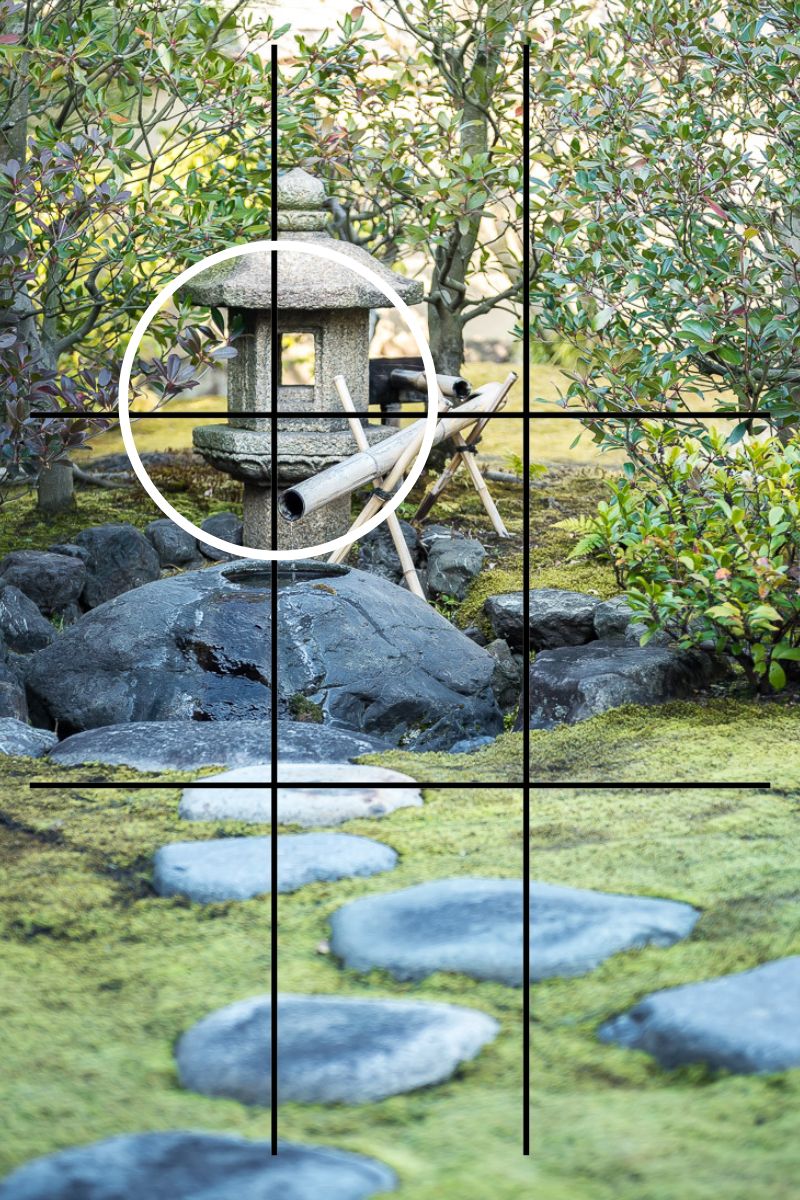
There’s one main easy rule of composition in photography that effortlessly makes your images look good.
It’s called the rule of thirds and basically, it tells you exactly where to place your subject or the horizon without having to guess.
That’s because it adds visual balance to your images and guides the viewer’s eye to the most important parts of the scene.
First, you need to enable the grid lines on your camera app which is often easy to do in the settings.
On IPhone go to settings > camera > activate grid.
This grid divides the frame into nine rectangles with two horizontal and two vertical lines.
The only thing you need to do is position key elements, such as horizons or subjects, along these lines or at their intersections.
That’s it.
Placing your subject ( a person, a building a detail, etc) off-center often creates more dynamic and visually engaging compositions.
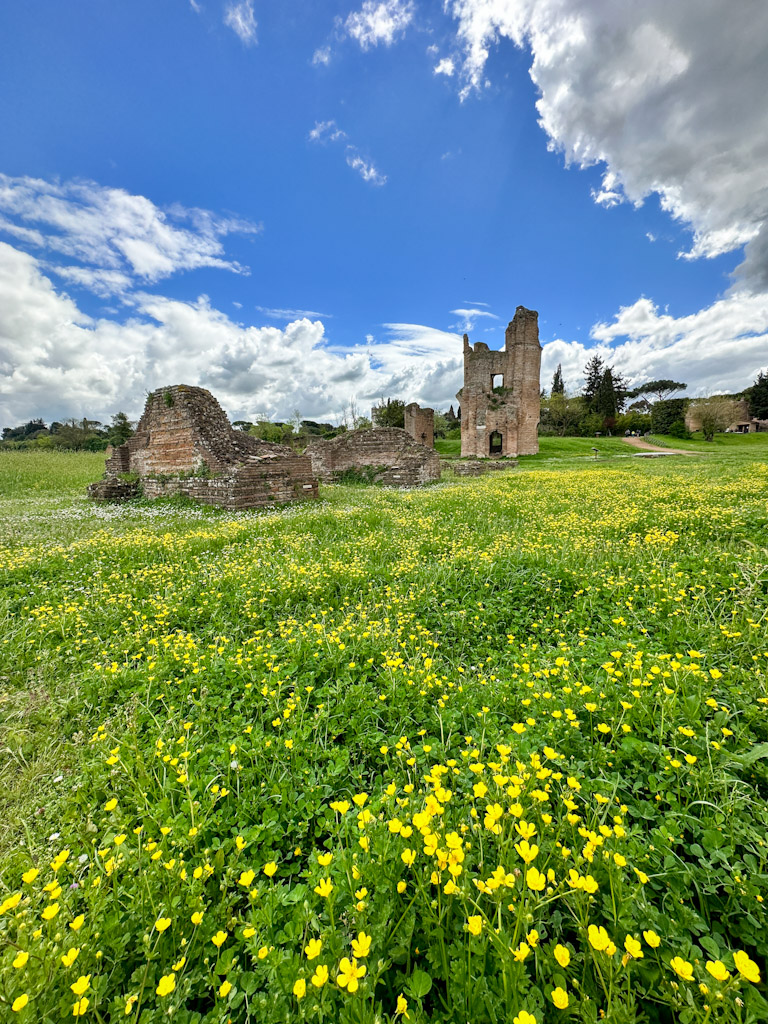
For landscapes, avoid placing the horizon line straight in the middle.
It’s much more effective to position the horizon on the lower or upper line of the grid depending on whether you want to emphasize the sky or the foreground.
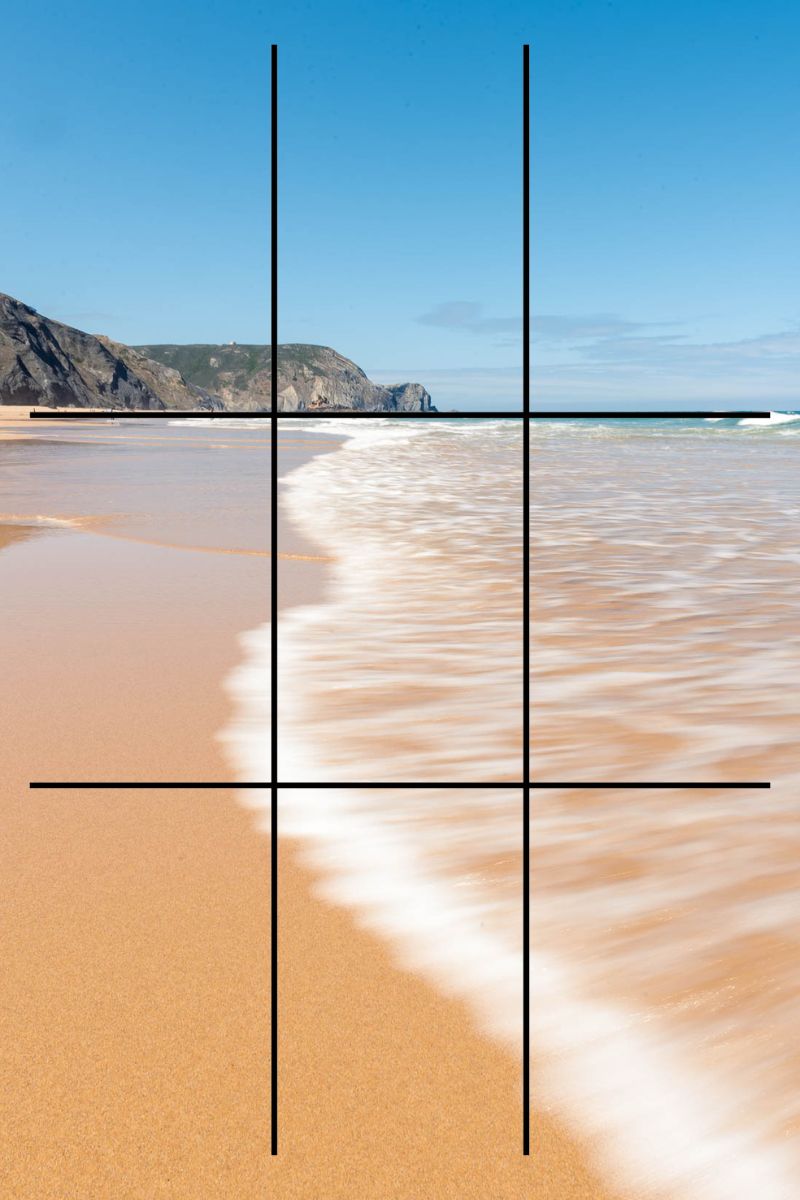
The grid helps you keep the horizon straight in travel photography
Paying attention to maintaining the horizon straight ensures that your images have a more pro and polished appearance.
A level horizon is essential for capturing balanced and visually appealing landscape images. A tilted horizon can be distracting and lead to an unbalanced composition.
Use the right camera app to shoot travel photography
Using and understanding your smartphone’s camera app to shoot your travel photos is the foundation of creating stunning photos, even if you’re not techy or know nothing about photography.
Take some time to explore your camera app settings, you don’t need anything complex or advanced to start.
In fact, the main features you need are simple ones that almost every app will have.
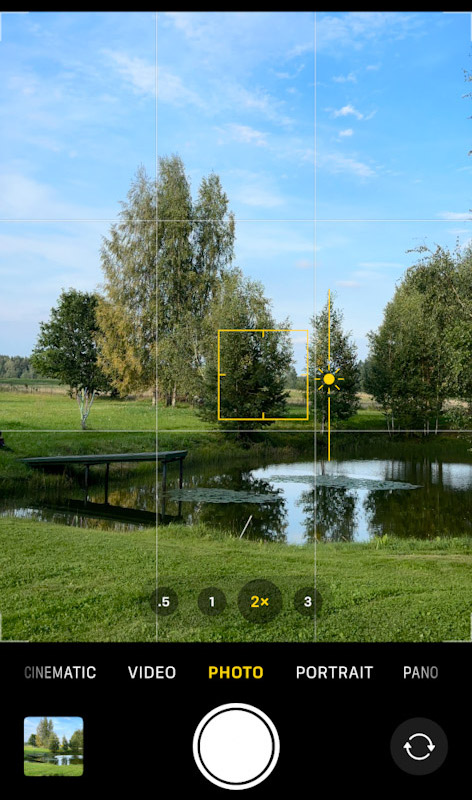
- Tap-to-focus and tap-to-expose allow you to pinpoint exactly where you want the camera to focus, as well as where you want to measure the light. Simply tap on your main subject. This will make sure your subject is correctly lit and also that it is sharp and clear.
For example, if you’re shooting a person in front of a landscape, tapping on them will make sure they are the right brightness and come out sharp.
- Exposure adjustment: Often this is a little slider on your screen next to your tap-to-focus point.
This slider lets you control the brightness of your photos and this can be crucial when you’re shooting against bright backgrounds or in low-light conditions.
Being familiar with how to use these simple settings will help you have more creative control over your photos and give you better results.
Having an app that allows you to shoot manual mode and RAW files is best for more advanced creators or for those who really want to make the most of their smartphones and take their photography to a higher level.
Elevate your shots with the right light
Paying a little attention to the light condition is one of the easiest ways to immediately improve your smartphone travel photography.
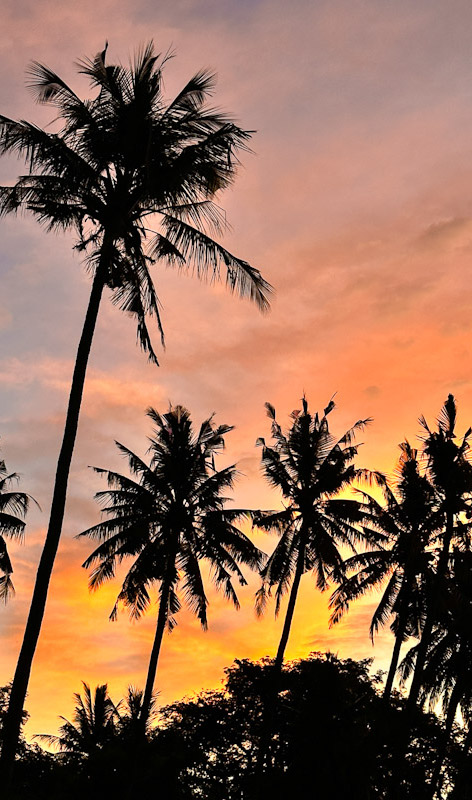
Any photographer will tell you that when you’re traveling you have to chase the golden hour.
This is a fleeting period of time after sunrise and before sunset when the light is warm and it casts a stunning glow on everything you shoot. The sun is also low in the sky and so this light angle produces long shadows and adds depth to your scenes.
You could shoot a turd in golden light and it would look beautiful.
However, this is not always possible when traveling.
There will be times when you are in that spot at midday and still have to get the shot.
During midday, when the sun is high in the sky, the sunlight is harsh and intense and the shadows are dark and sharp.
When shooting outside in these light conditions, the smartphone’s HDR mode is your best friend.
It will help you balance the exposure between bright and dark areas.
This is also the perfect light for shooting food inside a restaurant or in the shade of a gazebo as well as shooting close-ups and details or shooting indoors.
Overcast days provide beautifully diffused light that is excellent for portrait photography. It’s like a natural filter for your photos as it eliminates harsh shadows and makes the skin look smooth and perfect.
Don’t shy away from shooting during different lighting conditions; each type of light and weather brings its own unique atmosphere and can convey realism and authenticity to your images.
Clean Your Lens before shooting
Make cleaning your lens the first thing you do as soon as you think about capturing anything with your smartphone.
It is the simplest solution to crisp and clear photos every time!
This might sound intuitive but I have seen so many make this mistake!
Fingerprints, dust, and smudges are the main cause of hazy images, unwanted glare, or weird unrealistic colors.
Make it your habit to clean it consistently throughout the day and associate this action with the thought of shooting a picture and before you know it it will be an automatic, unconscious action that you do.
So simple and it makes SO MUCH difference!
How do I keep my smartphone lens clean?
Keeping your lens clean is the easiest way to get crisp and sharp images every time. Even a small smudge on your lens can significantly impact the quality of your images and wiping it it’s such a simple gesture to include in your pre-shooting ritual.
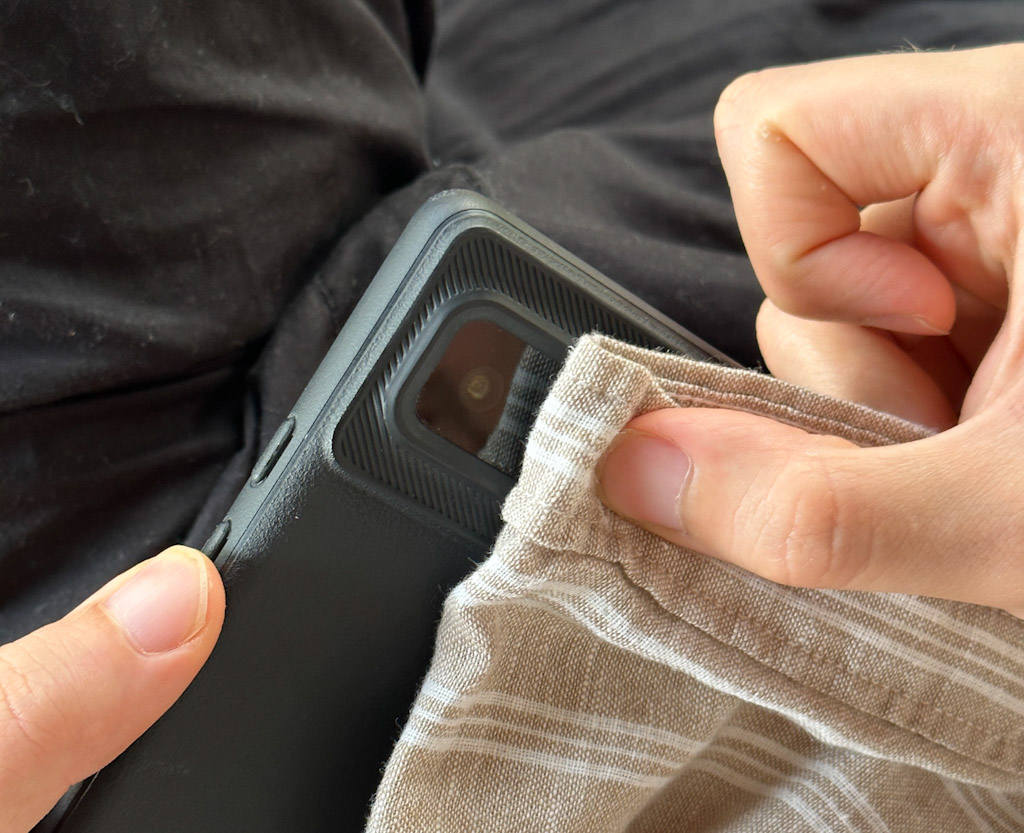
Now, I should tell you to gently wipe it with a microfibre cloth or a lens cleaning solution but let’s be realistic.
Overcomplicating it will prevent you from actually doing it consistently.
The easiest and simplest solution is to wipe it with your t-shirt or whatever item of clothing you’re wearing. Rubbing it on your jeans works wonders too.
If you’re shooting in environments with dust, sand, or water droplets, be especially attentive in keeping your lens clean and dry often to prevent distortion and haziness.
Experiment with shooting at different angles
To add an extra layer of creativity to your smartphone travel photography you can have fun exploring different shooting angles.
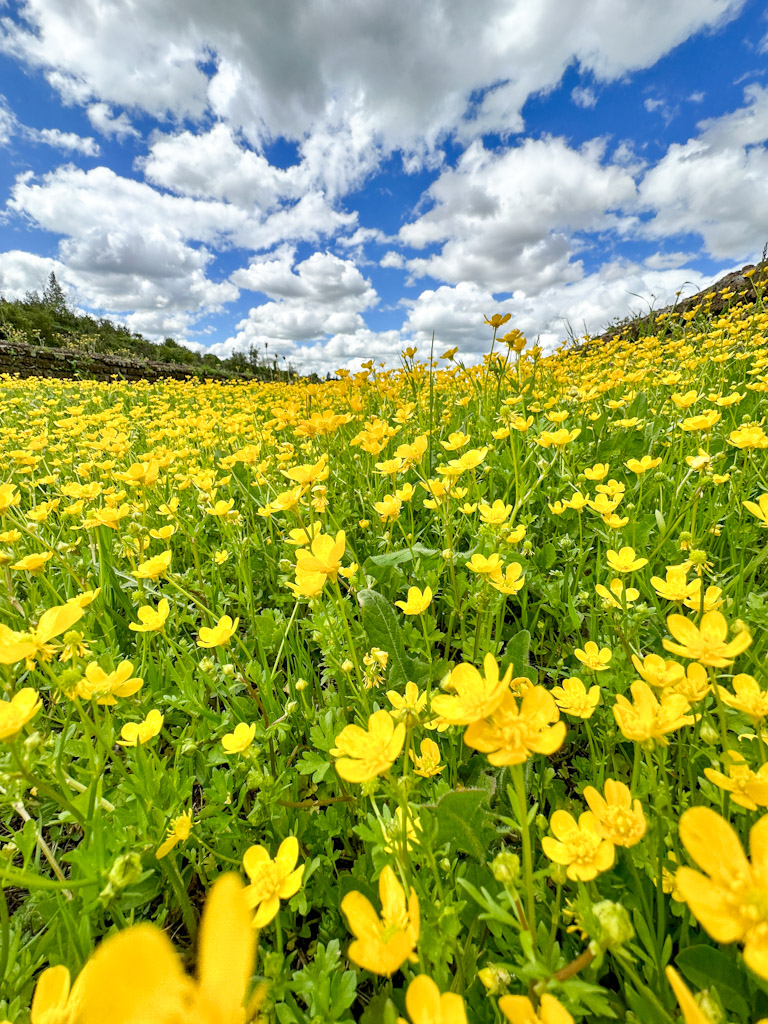
Instead of sticking to eye-level shots with the phone in front of your face, crouch down to capture scenes from a low angle.
This can make objects appear larger and emphasize foreground elements for example the beautiful waves on the golden beach, a puddle on a rainy day, or a beautiful field of flowers or grass.
On the contrary, shooting from an elevated position can provide a unique perspective of a scene and reveal patterns or shapes that might not be noticeable from the ground.
Think climbing stairs and shooting beach umbrellas from the top, or a market stall with a colorful display of fruit and veg, a beautiful plate of ramen from overhead to capture all those glorious toppings…
Breaking away from traditional shooting heights is one of the best ways to not only have fun while shooting but also convey your travel experiences and tell more interesting stories through unique images.
Avoid digital zoom on your smartphone.
Using the digital zoom of your camera is the easiest way to dramatically lower the quality of your smartphone photos.
Sure, many smartphones can zoom up to gazillionX but that doesn’t mean you should.
Zooming with your fingers (digital zoom) essentially crops the image, resulting in lower resolution and quality AKA pixelated shots with weird colored spots and lots of visible grain.
Also, it makes shooting much more difficult in low light resulting in blurry images and often it’s harder to keep the camera still and get a sharp shot.
Instead of relying on digital zoom, physically move closer to your subject whenever possible.
It’s ok to be lazy sometimes but treat it as an excuse to get your steps in for the day.
If you can’t get closer to your subject, it’s better to take the shot wide as is and then crop it later in editing.
Cropping after taking the photo gives you better control over the composition and ensures you’re not sacrificing image quality.
Lots of smartphones nowadays have different lenses for different zoom distances in which case it’s ok to switch to the lens that will give you the closest result to what you’re looking for.
Let’s say you’re shooting on one of the latest iPhones. You’d have 3 lenses: 1 lens is for the super wide angle of 0.5x, one lens is for 1x and one lens is for 3x.
If the scene you’re trying to capture would need a zoom of 2.5x, it would be better to walk backward until you can use the 3x lens.
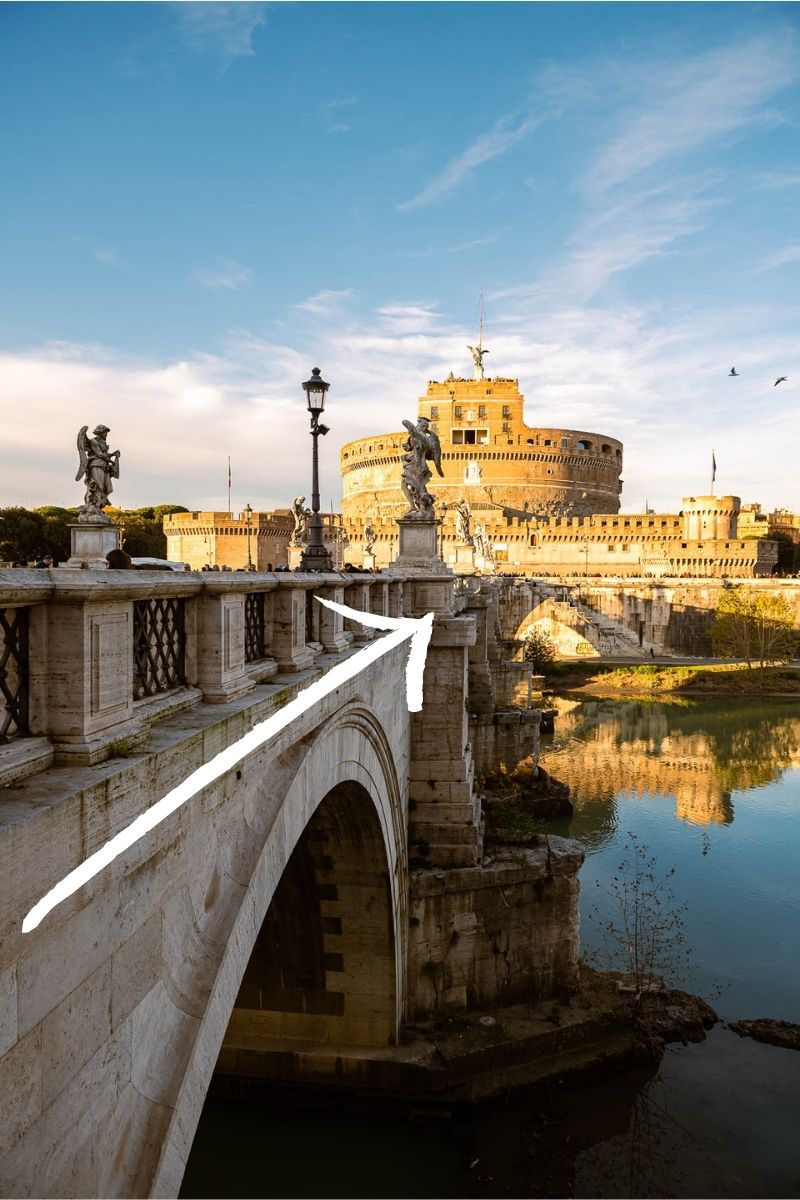
Use leading lines to hypnotize your viewer.
Another super powerful composition tool that helps your smartphone photos look pro is the use of leading lines.
I am obsessed with this technique as it is almost only used by pros and so mastering it will make you stand out from the crowd.
I wrote a whole article about this so if you wanna dig deeper take a look at it.
To keep it simple, as the name suggests, leading lines are used to lead the viewer’s eye into your frame which makes for a super compelling image.
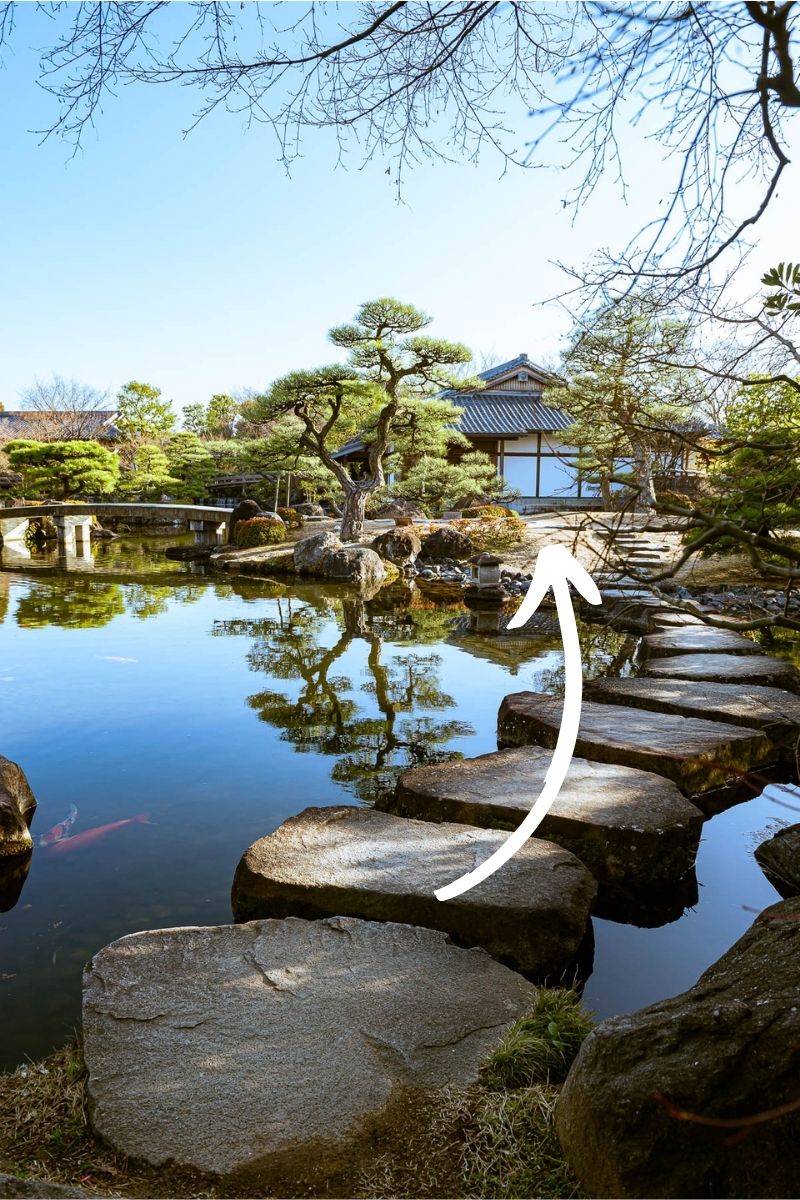
These lines can be found naturally in the environment – think roads, pathways, rivers, or even fences.
When positioning leading lines, consider where they start and where they lead, ensuring that they converge at a point of interest.
Generally speaking, it’s always more effective when the lines start at any corner of the image going inwards towards the center of the frame, where your main subject is placed.
Master portrait mode for images with an edge
Portrait mode is a super useful shooting mode available on most smartphones.
It’s a great tool for creating professional-looking shots of a subject with a blurred background.
You can use this for portraits, food, details, close-ups, and more.
The portrait effect simulates the shallow depth of field achieved by high-end cameras and lenses, basically, your subject is sharp while the background is blurry.
This creates a nice visual separation between the subject and the background and it is how you draw attention to your subject, add aesthetic depth to your photographs, and make your images look pro.
When using portrait mode, use the tap-to-focus function to make sure that your subject is in focus while the background is blurred.
Portrait mode is particularly effective for isolating people from distracting backgrounds or shooting food on a cluttered table, making a flower pop off the screen, etc, you get the idea.
Edit your smartphone travel photos like a pro
Editing is an incredibly important part of smartphone photography.
Your smartphone travel photos can significantly enhance their visual impact with just a bit of editing
I hear you say, I don’t like overly edited pictures and I want to maintain a natural and authentic feel to my images.
I absolutely agree!
To maintain a natural appearance the key is to edit thoughtfully and not overdo it, strive for a balance between enhancement and authenticity.
Avoid using filters or effects that dramatically alter the colors or tones of your images, as this can lead to unrealistic results.
Plus, it can get out of hand pretty quickly because if your eyes get used to the “fake” appearance, it’s hard to go back to the realistic vibe.
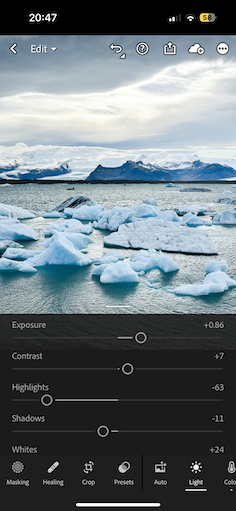
Start by adjusting basic settings like brightness, contrast, saturation, and sharpness.
Mostly, if you shot in bright daylight with strong contrasts, your aim should be to balance out the shadows and lights. Brighten the shadows while lowering the highlights. Again, don’t overdo it or it will look artificial.
On cloudy and overcast days with flat light and textures, your aim should be to increase the contrast and give the colors a little vibrance.
Go easy on the saturation slider, it’s the easiest way to mess up your editing!
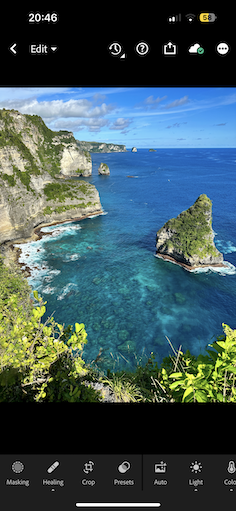
Best FREE smartphone editing apps for travel photography
Let’s see which apps are the best and easiest to edit your travel photos on your smartphone.
I have used Adobe Lightroom for decades and I do believe it’s the best editing app out there. I use the desktop version for my professional camera photography as well as the app for smartphone travel photography.
And it’s FREE! It’s got a paid upgrade to use all the fancy pro features but honestly, you don’t need any of those unless you really want to step up your photography
Use burst mode when shooting action
When traveling, often things happen quickly around you. Burst mode is a fantastic feature for capturing those unpredictable moments!
To activate burst mode, hold down the shutter button on your phone. With this feature, your smartphone captures a series of photos in rapid succession which means you can capture the whole action and then select the best shots from that sequence.
Sometimes is important to increase the likelihood of shooting the image that freezes the exact moment you’re aiming for.
This is especially handy for photographing moving subjects, whether it’s a street artist performing a trick, a lively market scene, a friend jumping into a pool, a bartender tossing the shaker in the air…
Never miss the action again!
Shoot creative long exposures with live mode
A super creative technique to elevate your smartphone travel photography involves using the “Live Mode” feature to simulate long exposures.
Long exposures have a mesmerizing effect because they can blur the water and make it look like silk, and blur passers-by for creative shots of busy markets, landmarks, squares, etc.
Oh, and light trails at night are also super cool.
This can be done easily with live mode on your smartphone.
The first thing you need to do is enable live mode and then take a shot, trying to keep your phone as steady as possible.
Then simply click on the “edit” option in your photo gallery and select “long exposure”. Tadah!
Conclusion
Shooting travel photography with your smartphone is not only possible but also fun and it can give you great results.
Even if you don’t want to get deep into the technical aspect of photography, learning a few simple tips can really help you elevate your travel shots, effortlessly!
Why not give it a try?
Loved this article?
Pin it for later!
Do you still have questions?
Leave a comment and I’ll clear all your doubts!